
Key Takeaways
- Maintenance is a routine, not a rescue mission: a few repeatable checks prevent the “it looked fine yesterday” spiral into cloudy water, algae, irritation, and equipment problems.
- The 4 systems you’re really managing: circulation (no dead zones), filtration (trap the fine stuff), sanitization (stable protection), and cleaning (remove the physical debris that feeds problems).
- Treat filter pressure like a check-engine light: know your clean baseline PSI and clean/backwash when it rises ~8–10 psi—otherwise you’ll chase clarity with extra chemicals while flow quietly gets worse.
- Consistency beats big chemical dumps: test first, dose second, wait for circulation, then retest. Balance in order: alkalinity → pH → sanitizer (small corrections, not wild swings).
- Clean first, then balance: skim/brush/vacuum before you add more product—sanitizer gets “spent” fighting leaves, dust, and oils if you try to chemically fix a dirty pool.
- Pump runtime is your pool’s daily heartbeat: run long enough for at least 1–2 turnovers/day, adjust in 30–60 minute steps, and increase time during heat, storms, and heavy use (split into two blocks if it helps).
- Know when to close the pool (no exceptions): if you can’t clearly see the deep-end floor, you’ve got visible algae/slime, or you’ve made a major chemical correction that hasn’t fully mixed yet—pause swimming and fix the cause.
Pool maintenance keeps water clean, equipment healthy, and swimmers safe. If you’re new to it, the first surprise is usually how “fine” a pool can look while quietly drifting into trouble (cloudy water, slippery algae, stinging eyes, or a pump that starts sounding like it’s auditioning for a horror movie). The misconception is that pool care is either complicated chemistry or an expensive weekly service you can’t replicate. In reality, it’s a short set of repeatable checks—once you know what matters and what’s just noise.
Here’s the key part: good maintenance is less about chasing perfect water and more about preventing small problems from becoming big bills. Balanced water helps protect surfaces and hardware, which means fewer stains, less scaling, and fewer “why is this leaking?” moments. On the safety side, predictable water clarity and sanitation reduce the risk of bacteria growth and help you actually see the bottom (a simple detail, but a huge deal when kids are around). And yes, your pool will simply feel better—no harsh smell, no itchy skin, no mystery film on the steps.
One quick note before we get practical: the win isn’t memorizing every number on day one. It’s building a routine you can trust. We’ll start with the core “systems” (circulation, filtration, sanitization, cleaning), then map those to a realistic schedule, step-by-step cleaning procedures, and the most common beginner mistakes—so you can avoid the expensive learning curve.
Pool Maintenance Basics
Water Circulation
Pool water circulation keeps water moving through the Pool Filter System so chemicals, heat, and debris don’t settle into “dead zones.” The main driver here is the pool pump: it pulls water from the skimmer and main drains, pushes it through filtration and (often) a heater or chlorinator, then returns it back to the pool through the return jets. That constant loop is what prevents stagnation (aka the fast track to cloudy water and algae).
Here’s the key part: water circulation is how you get consistent chemical distribution. In a Chlorine Pool, for example, you can add sanitizer and think you’re done, but without steady movement you’ll end up with pockets of higher or lower concentration—one corner might be over-chlorinated while a step area quietly turns into a algae hangout. Good circulation mixes your sanitizer level evenly, which is exactly what you want when your goal is “no surprises.”
Circulation also makes debris management easier because moving water naturally “herds” leaves and surface oils toward the Pool Skimmer. If your return jets are angled poorly, you’ll notice the opposite: floating debris spins in place and never reaches the skimmer basket. A beginner-friendly check is simple—look for a gentle, consistent surface pull toward the skimmer and adjust return eyeballs to create a slow circular flow.
One more practical note: circulation time matters as much as circulation power. Many pools need multiple hours of pump run time to fully turn over the water (especially after heavy use, storms, or heat waves). Building on that, anytime you add chemicals, run the pump long enough to fully mix them—because “I poured it in” is not the same as “the water is balanced.”
Filtration
Pool filtration removes the tiny particles circulation can’t solve on its own, and your Pool Filter System is basically the bouncer at the door—water can pass, gunk can’t. The pump provides the push, but the filter does the actual trapping, so when filtration slips, the pool usually looks dull or cloudy even if the sanitizer level is decent.
There are three common filter types, and each has its own personality (and maintenance rhythm):
- Sand filters: Water passes through a bed of sand that catches debris. Maintenance is mostly backwashing—reversing flow to flush trapped dirt out. You typically backwash when pressure rises from the clean baseline or when flow at the returns weakens. Sand itself isn’t replaced often, but it does eventually wear down and channel.
- Cartridge filters: Water flows through pleated cartridges that trap debris like a dense air filter. Cleaning is hands-on: remove the cartridge and rinse it thoroughly. When the pleats stay stained, the fabric frays, or pressure climbs quickly after cleaning, it’s usually time for replacement.
- DE (diatomaceous earth) filters: DE coats internal grids and captures very fine particles. The trade-off for that “polished” look is more involved upkeep: backwashing removes dirty DE, and then you recharge with fresh DE. Periodic full teardown and cleaning keeps the grids from getting caked.
The important detail is to treat filter pressure like a dashboard warning light. A clean filter has a known starting PSI; when pressure rises noticeably, filtration efficiency is dropping and circulation can suffer because the pump is fighting resistance. If you ignore that, you’ll often chase the problem with extra chemicals—when the real issue is that dirty filtration is leaving particles and organics in the water.
Sanitization
Pool sanitization prevents bacteria and algae from turning your pool into a science project, and it starts with keeping a stable sanitizer level—not just “adding some when you remember.” Sanitizer works best when filtration removes the stuff it needs to fight and water circulation distributes it evenly, so these systems are teammates, not separate chores.
Beginners usually choose between chlorine, bromine, and saltwater systems:
- Chlorine (classic Chlorine Pool): Effective, widely available, and straightforward to test and adjust. The downside is it’s easier to notice odor/irritation if levels swing or if the water has a lot of contaminants. Consistency is the win here—steady sanitizer level beats occasional big doses.
- Bromine: Often praised for staying effective in warmer water and being a bit more stable in certain conditions. On the other hand, it can be more expensive and is less common for large outdoor pools. It still needs regular testing and replenishment, just like chlorine.
- Saltwater systems: These use a salt chlorine generator to produce chlorine from dissolved salt. That means you’re still sanitizing with chlorine—the difference is how it’s created. The “pro” is convenience and steadier output; the “con” is you’re maintaining a system (cell cleaning, output settings) in addition to the water.
Whatever you pick, the non-negotiable habit is testing and adjusting before problems appear. A low sanitizer level can let algae get a foothold fast, and once it does, you’ll spend more time (and more chemicals) getting back to clear water than you would have spent maintaining it calmly. Want a simple sanity check? If the pool is getting heavy use, hot sun, or lots of debris, assume sanitizer demand is higher and test more often—because bacteria don’t take weekends off.
Cleaning
Pool cleaning removes the visible debris that clogs circulation paths, overloads filtration, and feeds algae—even when your sanitizer level looks “fine.” Think of cleaning as the physical side of maintenance: chemicals handle microbes, but they don’t magically lift leaves off the floor (nice try, though).

Start at the surface with the Pool Skimmer. Skimming frequently keeps leaves, bugs, and oils from sinking and breaking down into finer waste that’s harder for filtration to catch. Building on that, empty skimmer baskets before they’re packed—because a clogged basket chokes water circulation, and then the whole system becomes less effective.
Next comes brushing, which is the underrated algae prevention trick. Algae loves to cling to walls, steps, corners, and around returns where flow isn’t perfect. Brushing breaks that grip and pushes debris into suspension so the Pool Filter System can actually grab it. Focus on seams, ladders, and shaded areas—those are common “low-flow” spots that look clean until they suddenly… don’t.
For the floor, you’ve got manual and automatic options:
- Manual vacuuming with a Pool Vacuum: Great control, great results, and it forces you to pay attention to problem areas. Move slowly (rushing just clouds the water and lets debris escape).
- Automatic cleaners (suction, pressure, or robotic): Convenient for routine cleaning, especially for fine debris. The trade-off is you’ll still need to skim and brush—automatic units don’t always hit steps, tight corners, or waterline buildup consistently, and they’re not a true natural pool cleaner if your circulation and chemistry are off.
The important detail is timing: clean first when the pool is dirty, then balance. If you add chemicals to a pool full of leaves and dust, the sanitizer gets “spent” fighting that organic load, and you’ll wonder why the water isn’t improving. A little consistent cleaning—skimming, brushing, and vacuuming on a schedule—prevents the big, messy cleanups that make pool ownership feel like a part-time job.
Pool Components Explained
Pool Water
Pool Water determines whether your pool stays clear, comfortable, and safe to swim in. The important detail is that “clean-looking” water can still be unbalanced, and unbalanced chemistry quietly damages other components—especially the pool interior surface, the Pool Skimmer, and the Pool Filter System.
Balanced water chemistry is basically a teamwork situation between sanitizer and balance. Sanitizer (most commonly chlorine) handles the living stuff—bacteria and algae—while pH, alkalinity, and calcium hardness decide how aggressively the water behaves toward surfaces and equipment. If pH swings too high, chlorine becomes less effective and algae gets a head start; if pH drops too low, water turns corrosive and can irritate eyes (and shorten the life of metal parts and seals in your pool pump). This is why consistent water testing matters more than “fixing it later” with a big chemical dump.
Two common water issues show up fast:
- Algae: usually green, sometimes yellow/mustard, and it loves warm water, sunlight, and weak sanitizer. The fix is straightforward but not optional—brush the walls (especially corners and steps), raise sanitizer to a corrective level, and keep strong water circulation running so treated water reaches every spot.
- Bacteria/cloudy water: often caused by insufficient sanitizer or poor filtration time. The solution is to test, correct sanitizer and pH, and make sure the Pool Filter System is actually filtering (not bypassing due to a clogged or broken element).
Think of Pool Water like the “operating system” for the whole pool. When it’s stable, everything else works with less effort. When it’s unstable, you end up fighting the same problems on repeat—usually right before guests come over.
Pool Interior Surface
Pool Interior Surface sets the tone for how your pool feels underfoot—and how hard it is to keep clean. Here’s the key part: the surface is not just cosmetic. It directly affects brushing habits, how quickly algae can grab on, and even how forgiving your water chemistry is.
Most beginner pools fall into three categories:
- Vinyl (pool liner): Smooth and comfortable, and it doesn’t “trap” algae easily when maintained. The trade-off is vulnerability—sharp objects, rough brushing, and certain chemical mistakes can shorten liner life. You’ll want gentle brushes and consistent water testing, because extreme pH swings can make vinyl brittle over time.
- Fiberglass: Also smooth, often lower maintenance, and resistant to staining when chemistry is stable. Because it’s non-porous, algae has fewer places to root, so routine brushing is more about prevention than rescue missions.
- Concrete/plaster: Durable and classic, but typically more porous than vinyl or fiberglass. Porosity gives algae more places to cling, so brushing becomes a real maintenance tool, not a “maybe this weekend” task. Concrete surfaces also tend to be less forgiving if water becomes corrosive or scale-forming, so balanced Pool Water is a bigger deal.
A practical example: if you have a concrete pool and your sanitizer dips for a few days during hot weather, you might see algae appear on shaded walls first, because the surface gives it traction. With a vinyl pool liner, the same chemistry mistake may show up more as cloudy water than stubborn wall growth—different symptom, same root cause.
Surface choice doesn’t change the rules of chemistry, but it changes the consequences. Smooth surfaces buy you time. Porous surfaces demand consistency.
Skimmers and Returns
Pool Skimmer removes floating debris before it sinks, while returns push filtered water back into the pool to keep circulation moving. That pairing—capture on the surface, then distribute clean water—does more for daily cleanliness than most beginners expect.
Skimmers work by pulling a thin “sheet” of surface water into a basket (leaves, bugs, pollen—gone before they become a floor problem). If the skimmer basket is packed, suction drops, which hurts the entire system: the pump works harder, the filter gets less steady flow, and water circulation becomes uneven. Returns do the opposite job: they’re the jets that send cleaned water back out, ideally angled to create a slow, consistent circular pattern that moves debris toward the skimmer.
Maintenance is simple, but it needs to be routine:
- Empty the skimmer basket before it overfills (especially after windy days).
- Check the skimmer weir door (the little flap). If it sticks, surface debris won’t funnel in properly.
- Keep return jets clear so flow isn’t restricted; if the stream looks weak, the issue could be a clogged basket, dirty filter, or air leak upstream.
A quick “real life” check: if you see leaves floating in one corner all day, your returns likely aren’t aiming correctly for your pool shape—or your skimmer isn’t pulling well enough. Fixing that is not just about appearances. Dead zones (areas with poor circulation) are where algae starts because sanitizer doesn’t mix evenly.
Skimmers and returns are the pool’s steering wheel. When they’re clean and aimed well, the rest of your maintenance feels dramatically easier.
Pump System
Pool pump drives water circulation by pulling water from the skimmer and main intake lines and pushing it through the filter and back through the returns. The important detail is that the pump doesn’t “clean” the water by itself—it enables every other cleaning step to work consistently.
When people shop for a pool pump, they often fixate on horsepower. Horsepower matters, sure, but it’s not a trophy. Too much horsepower can actually cause problems (excessive flow, noisy plumbing, faster wear), while too little can lead to weak circulation and poor skimming. Energy efficiency is the other big attribute: an efficient pump can run longer at lower cost, and longer run time often equals better filtration and more stable chemistry mixing.
To keep a pump healthy, focus on the parts that fail from neglect:
- Pump basket: Check and empty it so flow stays strong. A clogged basket starves the pump and can cause overheating.
- Pump lid O-ring: Keep it clean and properly seated. A small air leak can cause bubbles at the returns and reduce filtration performance.
- Prime and water level: If water drops below the skimmer opening, the pump can suck air instead of water (not a fun sound, and not great for the equipment).
A simple analogy: the pool pump is your pool’s heartbeat. A strong, steady beat means chemicals mix, debris moves toward the skimmer, and the filter gets a constant workload it can actually handle. A weak or interrupted beat is when cloudy water and algae suddenly feel “mysterious.”
If you want longevity, don’t wait for the pump to complain. Most pumps give subtle warnings—reduced return flow, odd noises, frequent loss of prime—before they fail.
Filters
Pool filters physically remove fine debris so your sanitizer can focus on killing algae and bacteria instead of wrestling with dirt. The key part is that “filter type” isn’t about which one is “best,” but which one fits your maintenance style and how you want cleaning to work.
The three common options are:
- Sand filter: Water passes through a bed of sand that traps particles. Cleaning is done via backwashing—reversing flow to flush dirt out. Sand filters are beginner-friendly, but they typically catch slightly larger particles than other types, so water may be clear-but-not-sparkly unless the system is dialed in.
- Cartridge filter: Water passes through a pleated cartridge element. Cleaning usually means removing the cartridge and rinsing it thoroughly. No backwashing, which can help with water conservation, but you do need hands-on cleaning when pressure rises.
- DE (diatomaceous earth) filter: Uses DE powder to coat grids and trap very fine particles. It can deliver very clear water, but cleaning involves backwashing and then recharging with fresh DE, plus occasional deeper cleanings.
No matter what filter you have, pressure monitoring is your built-in “maintenance reminder.” When the filter clogs, pressure increases and flow drops—your returns will look weaker, skimming gets worse, and algae becomes more likely because circulation suffers. Backwashing (for sand and many DE setups) isn’t something you do on a schedule just because; it’s something you do because the system is telling you it’s time.
A practical scenario: if your water looks dull and you’re battling algae, you can raise sanitizer all you want, but if the filter is overloaded and pressure is high, dead algae and debris will keep circulating. That’s why filter cleaning isn’t glamorous, but it’s often the difference between “fixed” and “back tomorrow.”
Filtration System
Pool Filter System combines the pump, filter, and plumbing path into one job: move water, trap debris, and return cleaner water back to the pool safely. Building on that, it’s also the system that keeps your chemical treatments honest—because sanitizer can’t protect areas that never get properly circulated.
Here’s how the integration works in plain terms. The pool pump creates suction that pulls water from the Pool Skimmer (and other intakes), then pushes it through the filter media (sand, cartridge, or DE). After filtration, water returns through the jets, ideally creating consistent water circulation that prevents “dead spots.” If any part of that chain breaks—clogged baskets, dirty filter, air leak, blocked returns—you don’t just lose clarity. You lose even mixing, which affects how reliable your water testing results are from day to day.
Safety is the quiet benefit people forget. Clear water isn’t just pretty; it’s visibility. If you can’t clearly see the pool floor, that’s a real risk, especially with kids or crowded swim days. The filtration system is what makes “I think it’s fine” into “I can see it’s fine.”
A helpful way to think about it: chemicals are the cleanup crew, but the filtration system is the delivery truck and trash removal. If the truck stops running, the crew can’t reach every room, and the trash never leaves the house. That’s when you get repeating issues like recurring algae or persistent cloudiness even after you “treated” the water.
For beginners, the most practical habit is to treat flow changes like check-engine lights. Weak returns, poor skimming, rising filter pressure, or air bubbles are all signs the Pool Filter System needs attention before water quality slides.
Pool Covers
Pool cover reduces heat loss, blocks debris, and cuts water evaporation, which makes maintenance easier and cheaper in a very unexciting (but wonderful) way. The important detail is that a cover doesn’t replace circulation or sanitizing—it reduces how hard those systems have to work.
The biggest wins are immediate:
- Heat retention: Less heat escaping overnight means warmer water with less heater runtime (or less sunlight-dependent temperature swing).
- Debris prevention: Leaves, dust, and insects stay on top of the cover instead of sinking and feeding algae.
- Water conservation: Lower evaporation means fewer top-offs, which also helps keep chemistry steadier because you’re not constantly diluting and rebalancing.
Cover types usually fall into a few practical buckets. A basic tarp-style cover is often the budget entry point for debris, while a solar cover focuses on heat retention and evaporation control. Safety covers are designed to support weight and add a layer of protection when the pool isn’t in use (especially relevant for households with kids or pets). The “best” option depends on whether your main pain is temperature, cleaning time, or safety.
A real-world example: if you’re doing water testing and noticing your levels drift after every windy day, a pool cover can stop the cycle by keeping organic debris out in the first place. Less debris means less sanitizer demand, which means fewer surprise algae blooms when the weather turns hot.
Covers are not flashy equipment. They’re more like a good lid on a pot: everything stays more stable, and you spend less time reacting to problems you didn’t need to have.
Routine Pool Maintenance Schedule
Daily Tasks
Pool Water shows you problems early if you look at it every day. Start with a 30-second water clarity check: the deep end floor should be clearly visible, and the waterline should not look “milky” or dull. When clarity drops, you are usually seeing the first signs of under-filtration, a chemistry drift, or an incoming algae bloom (the kind that turns a relaxing swim into a science project).
Pool Skimmer cleaning is the fastest win for daily cleaning. Skim the surface for leaves, bugs, and sunscreen “floaties,” because that debris will eventually sink, stain, or feed algae. The how is simple: move in slow, overlapping passes so you do not push debris away from the net. The important detail is that surface gunk also clogs circulation pathways later (skimmer basket, pump basket, and the Pool Filter System), so this tiny habit protects equipment longevity, not just aesthetics.
The pump should be running when you expect it to circulate and filter. Confirm the pump is on, listen for normal sound (no grinding or whining), and check that return jets are moving Pool Water (you should feel flow with your hand). If the pump is off or flow is weak, water can go stagnant surprisingly quickly, which is bad for cleanliness and even worse for pool safety when visibility drops.
Pool safety also starts outside the water. Do a quick lap around the pool area to spot hazards or damage: loose coping stones, cracked decking, a broken ladder handrail, or a slipped drain cover. A small issue today is usually a bigger repair tomorrow (and tomorrow’s repair somehow always lands on your weekend).
Weekly Tasks
Pool Water testing keeps your maintenance schedule from turning into guesswork. Set a weekly “water testing day” and stick to it—because chemistry drift is gradual, and gradual problems are the ones that sneak up on you. When you test, take a consistent water sample from elbow depth away from the returns, so results aren’t skewed by surface oils or freshly added chemicals; use a Liquid Test Kit for consistency (and keep a Test Strip as a quick daily spot-check if you want fast trend signals). Test, then adjust in small steps; the goal is controlled correction, not a wild swing that stresses swimmers and surfaces.
Here’s the key part: chemical levels and filtration work together. If your Pool Filter System is doing its job but sanitizer or balance is off, you can still end up with cloudy water, scale, or irritation. On the other hand, perfectly balanced chemistry won’t save you if circulation is poor and debris is piling up. Weekly water testing is where you connect those dots and keep cleaning efficient.
Pool Skimmer baskets deserve a weekly clean-out even if you skim daily. Empty and rinse the skimmer basket(s) so water can flow freely—restricted flow makes the pump work harder and can reduce filtration performance. While you are there, glance at the Pool Filter System gauge and note filter pressure. A rising number compared to your normal baseline is your early warning that the filter is loading up and needs attention (your future self will thank you for tracking it).
Pool Brush time is where you prevent the “invisible” buildup. Brush walls, steps, corners, and the waterline where oils like to cling—especially residue from suntan lotion. Brushing breaks up biofilm and loosens fine debris so it can be captured by filtration instead of becoming a stubborn stain. Think of it like sweeping before you mop: you are making the rest of your cleaning actually count.
Weekends often mean higher foot traffic, and that changes the equation. More swimmers typically means more sunscreen, sweat, and debris, so plan for a weekend check-in: re-test Pool Water if the pool was busy, empty skimmer baskets again if needed, and give high-contact areas (steps and shallow end) an extra brush.
Monthly Tasks
Pool maintenance schedule habits work best when you add one “deep dive” each month. A monthly inspection is your chance to catch small wear before it becomes a leak, a clog, or an expensive call-out. Walk the pool slowly and look with intention: hairline cracks at the waterline, loose fittings, worn seals, or discoloration that could signal circulation dead zones.
Pool Filter System care is a monthly non-negotiable because it is the heart of clean water. Check the filter tank, unions, and visible plumbing for drips or salt/mineral crusting—often caused by slow leaks that leave mineral build-up as water evaporates. Record filter pressure again and compare it to your normal operating reading. The important detail is that filter pressure is not just a number—it is a trend. A steady rise typically means the filter is loading with debris; a sudden drop can suggest a suction-side issue, air leak, or blockage.
Pool Skimmer components should also get a closer look monthly. Inspect the skimmer lid (trip hazard), the weir door (it should move freely), and the basket condition (cracks can let debris through). If the skimmer area is pulling in air or not “catching” debris well, that can point to water level issues or flow restrictions that affect overall cleaning performance.
Minor repairs belong here, not “someday.” Tighten loose hardware, replace worn gaskets you can safely access, and address small chips or sharp edges that could impact pool safety. If your equipment has manufacturer-recommended lubrication points (like certain O-rings on accessible unions or lids), apply lubricant as needed during this monthly check. A tiny amount of correct lubrication can prevent stuck lids, torn seals, and the kind of leaks that start as a drip and end as a headache.
Annual Tasks
Pool Water benefits from an annual reset because a full year of weather, swimmers, and chemistry leaves a footprint. Plan one thorough cleaning session where you treat the pool like it is getting a “deep clean,” not just a tidy-up. That means removing built-up grime at the waterline, cleaning hard-to-reach corners, and giving steps and ledges extra attention. If you store gear nearby, check the equipment pad and storage areas too—damp, closed spaces can invite mold, which is not a pool-water issue but absolutely becomes a maintenance headache.
A deep chemical balance check is the other half of the annual job. Do a comprehensive round of water testing and correct imbalances methodically so you start the season (or your heaviest-use period) with stable, comfortable water. The key part is consistency: balanced Pool Water helps sanitizer work properly, reduces scaling and staining risk, and keeps surfaces and equipment from taking unnecessary stress.
Pool Filter System service should be treated like preventative maintenance, not a reaction to cloudy water. Review your annual filter pressure history (even basic notes help) and look for patterns: rising baseline, more frequent spikes, or pressure behavior that has changed compared to earlier months. Pair that with a full check of the filter housing and connections, because seals and fittings age quietly until they do not.
Professional inspection is worth budgeting for at least once a year, especially for pumps, a pool heater, and any automated systems. A technician can spot early wear, electrical issues, or performance drops that are easy to miss when you see the equipment every day. On the other hand, if something looks or sounds “off” during your annual routine—odd pump noise, persistent pressure problems, recurring cloudiness—professional service stops the problem from snowballing and supports long-term pool safety.
Pool Maintenance for Beginners Checklist
Weekly Checklist
A weekly pool maintenance schedule prevents debris buildup, keeps chemical level swings small, and helps your filter and pump do their jobs without drama. The trick is consistency: little, predictable actions beat “big cleanups” every time (your future self will thank you).
Here’s a beginner-friendly weekly flow that works for most home pools:
- Test water chemical levels (2–3 times per week, more if it’s hot or busy): Check sanitizer and pH first, because they set the tone for everything else. If readings are off, adjust in small steps and retest after circulation. Big changes in one shot are how pools go from “fine” to “why is it cloudy?” overnight.
- Skim the surface daily or every other day: Use a leaf net to remove floating debris before it sinks and starts staining or feeding algae. Think of skimming like taking out the trash—small task, huge payoff.
- Brush the pool walls and steps (weekly): Algae loves clingy spots (corners, steps, tile line). Brushing breaks up that film so your sanitizer can actually reach it, instead of fighting through a slimy shield.
- Vacuum the floor (weekly, or as needed): Manual vacuuming or an automatic cleaner is fine—what matters is removing settled debris before it turns into cloudiness and “mystery dirt.”
- Empty skimmer and pump baskets (weekly): A full basket chokes water flow. Less flow = weaker filtration = more problems, faster.
- Run the pump long enough for clean circulation: Aim for a daily runtime that keeps water moving and filtered; longer runtime is usually needed during heat waves, storms, or heavy use. Here’s the key part: chemicals work better when water is circulating evenly.
Order for adding pool chemicals (simple and safer): test → adjust pH/alkalinity → add sanitizer → add “extras” (like algaecide/clarifier only if you truly need them). Also: add one product at a time, let it circulate, and avoid mixing chemicals together in the same container. That’s not “efficient,” it’s how accidents happen.
Seasonal Checklist
Seasonal pool maintenance handles what weekly routines don’t: equipment wear, water balance shifts, and weather-related stress (freeze, heat, storms, pollen—you name it). Building on that, think of seasonal care as the “inspection and reset” layer on top of your normal maintenance schedule.
Opening checklist (spring/early summer):
- Remove and clean the cover (if used): Rinse off debris away from the pool so dirty runoff doesn’t go right back in.
- Inspect equipment before running it hard: Check the pump lid O-ring for cracks, look for drips at fittings, and confirm valves move smoothly. Small air leaks can look like “weak suction” and lead you on a wild goose chase.
- Prime the pump and restore circulation: Once water is moving, you can properly test chemical level readings (stagnant water lies).
- Deep clean after winter: Skim, brush, and vacuum thoroughly. Winter debris tends to be heavier and more stubborn, and it can overwhelm filtration if you try to “filter it out” instead of removing it.
- Balance water in a sensible sequence: Start with pH/alkalinity adjustments, then sanitizer. The important detail is that balanced water protects surfaces and equipment, while sanitizer protects swimmers.
Closing checklist (fall/early winter):
- Clean first, then protect: A clean pool closes better (and opens easier). Remove debris, brush walls, and vacuum so gunk doesn’t sit for months.
- Adjust chemical levels for off-season protection: Your goal is stable, protected water that won’t turn corrosive or scale-forming while the pool is unused. Don’t “guess”—test, then adjust in steps with circulation.
- Lower water level (if required for your cover/setup): Do this only as appropriate for your pool type and local winter conditions.
- Protect plumbing and equipment: Drain water from exposed equipment and lines where freezing is a risk, and store removable parts if applicable. Freezing damage is one of those expensive surprises you really can avoid.
- Final inspection for wear and tear: Look over hoses, clamps, baskets, and seals. Replacing a tired gasket now is cheaper than troubleshooting a mid-season leak later (and yes, leaks always pick the worst timing).
Printable Checklist Version
Pool maintenance stays easier when the checklist is visible—on the fridge, in the shed, or taped inside the pump lid box (glamorous, I know). Below is a simplified, printable version with clear steps you can follow without overthinking the process.
Weekly (repeat every 7 days)
- [ ] Test chemical level: sanitizer + pH (retest after adjustments)
- [ ] Skim debris: remove leaves/bugs before they sink
- [ ] Brush walls/steps: focus on corners + waterline
- [ ] Vacuum floor: remove settled debris
- [ ] Empty baskets: skimmer basket + pump basket
- [ ] Run pump: ensure steady circulation for filtration and chemicals
- [ ] Add chemicals in order: test → pH/alkalinity → sanitizer → optional extras (one at a time)
Seasonal (opening/closing)
Opening
- [ ] Clean/rinse cover (keep debris out of the pool)
- [ ] Inspect pump/filter/hoses for leaks and worn seals
- [ ] Restore circulation (prime pump, confirm flow)
- [ ] Deep clean: skim + brush + vacuum
- [ ] Balance water: pH/alkalinity first, then sanitizer
Closing
- [ ] Deep clean: remove debris, brush, vacuum
- [ ] Adjust chemical levels for off-season protection (test, then adjust)
- [ ] Protect equipment/lines (drain where freezing is possible)
- [ ] Inspect for wear and tear (replace small parts now, avoid big repairs later)
Cleaning Procedures (Step-by-Step)
Skimming
Pool Skimmer removes floating debris before it sinks and turns into a bigger cleaning job. That’s the whole game: catch leaves, bugs, pollen, and random backyard “surprises” at the surface while they’re still easy to grab (and before they start clogging your system).
The best time to skim is early morning (before swimmers stir things up) and again in the evening after the wind has done its daily dump. Building on that, skim right after heavy use, storms, or mowing the lawn—those are the moments when debris load spikes, and waiting “until tomorrow” usually means you’ll be vacuuming what could’ve been a 3-minute skim.
For tools, you just need a Pool Skimmer (a leaf rake or flat skimmer net on a telescopic pole). Here’s a technique that actually works for beginners: move slowly, keep the net slightly angled, and “lead” debris into the mesh instead of chasing it like it’s a fast fish. Fast swipes create a mini current that pushes leaves away, which feels unfair but is very on-brand for pools.
Pay extra attention to downwind corners, steps, and any spot where water circulation looks weaker (you’ll often see a little surface “gathering” there). If you notice a constant stream of floating debris returning after you skim, that’s a clue you’re skimming the symptom, not the source—check nearby trees, overhanging plants, or whether your return jets are pushing debris into the same corner every day.

A simple rule: if you can see debris, skim it now. Surface gunk is easy; bottom gunk is a commitment.
Brushing
Pool Brush breaks up algae film and stuck-on dirt so your filter and sanitizer can actually do their jobs. Skimming handles floaters, but brushing is what stops that slippery layer from claiming your walls (and turning your waterline into a science project).
Brush choice matters because pool surfaces are picky. For plaster or concrete, a stiff-bristle Pool Brush is usually the right tool for scrubbing without babying the surface. For vinyl liners and many fiberglass pools, go softer—nylon bristles are the safer bet so you don’t risk scratching, fraying, or scuffing the finish. On the other hand, if you’re not sure what your surface is, start with a gentler brush and increase stiffness only if you’re not getting results (your pool should not look like it lost a fight).
Technique is where beginners win: brush methodically, not randomly. Work top-to-bottom on walls so loosened dirt drifts down where it can be vacuumed later, and overlap your strokes like you’re mowing a lawn. The important detail is consistent pressure—light “petting” doesn’t remove biofilm, and aggressive scraping can damage delicate finishes.
Common trouble spots deserve extra attention because circulation is weaker there and algae loves low-flow areas. Focus on:
- corners and tight angles
- steps and ladders (especially behind them)
- along the waterline tile/band
- around lights, returns, and drains
- under skimmer openings and along seams (for liners)
If your water turns slightly cloudy after brushing, that’s not failure—that’s the gunk finally letting go and getting suspended so your system can filter it out. Brush first, then plan to follow with a pool vacuum pass so you’re not just redistributing the mess.
Vacuuming
Pool Vacuum removes the debris that skimming and brushing intentionally knock loose. Think of it as the “final sweep” that keeps dirt from settling, staining, or feeding algae on the floor—because yes, the bottom of a pool is where problems go to hide.
You have two main options: manual vacuuming and automatic vacuuming. Manual gives you control (great for targeted cleanup), while automatic saves time (great for maintenance rhythm). Here’s the key part: whichever route you choose, you’ll get better results if you brush first and let the loosened debris settle for a bit, then vacuum.
Manual Pool Vacuum basics: attach the vacuum head to a telescopic pole, connect the hose, and submerge the hose to fill it with water before you connect it (this prevents blasting air into the system and losing suction). Move slowly in straight passes, slightly overlapping, and avoid “jabby” movements that kick debris back into suspension. If you’re vacuuming and you see a cloud trailing behind, you’re moving too fast—slow down until the floor stays visible.
Automatic Pool Vacuum basics: place the unit in the water according to its directions, make sure it has room to move, and keep the pool area clear (toys, loose poles, and floating thermometers tend to get “adopted”). Check it during the first run to confirm it’s actually covering the pool and not repeatedly bumping one wall like it’s stuck in a loop.
Maintenance tips are simple but non-negotiable. For manual setups, rinse the vacuum head, check the hose for cracks or kinks, and store it out of harsh sun so it doesn’t get brittle. For automatic units, clean out any internal screens or collection areas, inspect moving parts for tangled hair/leaves, and watch for weak suction or reduced movement—those are early signs something is clogged or worn.
Vacuuming feels slow the first few times, but it’s one of those chores where “gentle and steady” is the fastest way to finish.
Basket Cleaning
Pool Skimmer and pump baskets protect circulation by catching debris before it reaches the pump and filter. Clean baskets keep water moving; clogged baskets choke flow, reduce skimming power, and can make the whole system run inefficiently (or just sound angry, which is never a great sign).
Start with the skimmer basket. Turn off the pump, lift the skimmer lid on the pool deck, and remove the basket carefully—wet leaves tend to fall apart and drop back into the opening if you yank it out too fast. Dump the debris, rinse the basket with a hose, and check for cracks or warped plastic that could let debris slip through. If the basket is packed tight, that’s your hint that you should be cleaning more often, not forcing more debris into the same space.
Next is the pump basket (often in the pump strainer pot under a clear lid). Always turn off power first, then open the lid slowly to relieve pressure. Pull out the basket, empty and rinse it, and make sure the lid O-ring is clean and seated properly before closing everything back up. A dirty or pinched O-ring can let air leak in, which can reduce prime and weaken circulation—basically, your pool starts acting like it’s tired all the time.
Frequency depends on what’s falling into your pool, but beginners do best with a simple habit: check skimmer baskets a few times per week and after windy days or heavy use, and check the pump basket regularly as part of that routine. The important detail is that basket cleaning isn’t just “tidiness”—clogged baskets directly impact circulation, and poor circulation makes every other step (skimming, brushing, pool vacuum work) less effective.
Pump and Filter Operation
Pump Run Time
Pool Filter System pump run time keeps water circulation steady enough to prevent dead spots, cloudy water, and that “why does it look dull again?” moment. The practical goal is simple: run the pump long enough to filter the full pool volume at least once per day (more when the pool is under heavy load).
A beginner-friendly baseline is to match run time to pool size, then adjust for season. For many residential pools:
- Small pools (up to ~10,000 gallons): 6–8 hours/day in mild weather; 8–10 hours/day in peak summer.
- Medium pools (~10,000–20,000 gallons): 8–12 hours/day in mild weather; 10–14 hours/day in peak summer.
- Large pools (20,000+ gallons): 10–14 hours/day in mild weather; 12–18 hours/day in peak summer.
Seasonal variation matters because the pool’s “dirt budget” changes. Warm water, more swimmers, sunscreen, and longer daylight hours all increase what your Pool Filter System has to catch—especially when a strong ultraviolet ray load burns through sanitizer faster than you expect. On the other hand, in cooler shoulder seasons (or when the pool is covered and barely used), you can often step down run time without sacrificing clarity.
Here’s the key part: don’t change everything at once. Adjust in 30–60 minute steps for a few days, then judge results by water clarity, surface debris, and filter pressure trends. If your water gets hazy or you notice weak skimming action, that’s your system hinting that water circulation needs more time (or a clog needs attention).
A simple scheduling trick is splitting runtime into two blocks (morning + late afternoon). That keeps circulation consistent and makes skimming more effective, especially if trees drop debris at predictable times.
Turnover Rate
Pool Filter System turnover rate tells you how long your pump needs to move a volume of water equal to your pool’s total capacity. In other words, it answers: “How many hours do I need to run this thing so the whole pool gets filtered?”
The calculation is straightforward, once you know two numbers:
- Pool volume (gallons)
- Pump flow rate (gallons per minute, GPM) at your typical operating condition (ideally based on your system’s real-world flow, not the most optimistic box label)
Use this formula:
- Turnover time (hours) = Pool gallons ÷ (GPM × 60)
Example time. Say your pool is 15,000 gallons and your system is moving 50 GPM.
- Turnover time = 15,000 ÷ (50 × 60) = 15,000 ÷ 3,000 = 5 hours
If you run the pump 10 hours/day, you’re getting about 2 turnovers/day in that scenario. That’s often a comfortable place to be during peak season, because extra turnover gives your Pool Filter System more chances to grab fine particles before they resettle.
Now the important detail is that flow rate is not a fixed number. Dirty filters, partially closed valves, clogged skimmer baskets, or even a full pump basket can reduce GPM, which silently stretches your turnover time. That’s why turnover isn’t just math—it’s also troubleshooting. If you “should” be fine on paper but water circulation looks weak, treat that as a clue to check baskets, valves, and filter pressure before you add more runtime.
A practical mini-audit: calculate your expected turnover, set a runtime that should achieve 1–2 turnovers/day, then watch your pressure gauge and skimming performance for a week. Clean filter + stable pressure + clear water usually means you’re in the sweet spot.
Pressure Gauge Readings
Pool Filter System pressure gauge readings show how hard the pump is pushing water through the filter, which makes them one of the quickest “health checks” you have. Pressure will vary by pool plumbing and pump size, but each filter type tends to live in a predictable neighborhood when clean and running normally.
Typical normal operating ranges (when the filter is clean and flow is healthy) often look like this:
- Sand filters: roughly 10–20 psi
- Cartridge filters: roughly 10–25 psi
- DE filters: roughly 10–25 psi
Don’t treat those as a universal law—treat them as context. What matters more is your clean starting pressure (your personal baseline). After a full cleaning or backwashing, note the gauge reading with the pump running at its usual setting. Write it down. That number becomes your reference point for when maintenance is required.
Signs your filter needs attention:
- Pressure rises 8–10 psi above your clean baseline: the filter is loading up with debris (time for backwashing or cleaning, depending on filter type).
- Pressure is unusually low: this can point to restricted suction (clogged skimmer basket, pump basket, or blocked line) or an air leak affecting water circulation.
- Pressure fluctuates or spikes: often tied to trapped air, a dirty basket, or a valve position that’s not fully open.
Here’s a practical way to think about it: filter pressure is like a “traffic report” for water flow. As the filter catches more particles, water has to fight harder to get through, so pressure climbs. If you ignore that climb, circulation drops, your sanitizer distribution gets patchy, and clarity usually follows.
One more beginner-friendly habit: glance at the gauge daily when the pump is on. You’ll start to recognize what “normal” looks like for your Pool Filter System, and you’ll catch problems early—before the water turns on you.
Backwashing
Pool Filter System backwashing clears trapped debris from a sand filter by reversing water flow through the filter media, flushing gunk out to waste. It’s one of those maintenance tasks that sounds dramatic, but it’s basically your filter taking out the trash.
You’ll know backwashing is needed when:
- Filter pressure rises ~8–10 psi above your clean baseline
- Return jets feel weaker and water circulation drops
- The water starts to lose sparkle even though chemistry looks fine (annoying, but common)
Step-by-step backwashing procedure (sand filter):
- Turn off the pump. Always. Moving the multiport valve under pressure can damage internal parts.
- Set the multiport valve to “BACKWASH.” Make sure it clicks firmly into position.
- Turn the pump on and watch the sight glass (if you have one) or the discharge line.
- Backwash for ~2–3 minutes or until the water runs clear (cloudy-to-clear is the typical progression).
- Turn off the pump again.
- Set valve to “RINSE.”
- Turn the pump on for 20–60 seconds. Rinse settles the sand bed and prevents dirty water from blasting back into the pool.
- Turn off the pump and return the valve to “FILTER.”
- Turn the pump on and confirm the pressure is back near your clean baseline.
Frequency depends on bather load, debris, and season, but a good beginner rule is: backwash only when the pressure rise tells you to. Too much backwashing can be counterproductive because a slightly “seasoned” sand bed can filter finer particles better than brand-new, freshly blasted sand.
If backwashing doesn’t drop pressure much, that’s a clue. Either the pressure issue is coming from somewhere else (like a clogged basket) or the sand filter needs deeper service. The key is letting your filter pressure and water circulation symptoms guide you, not a random calendar reminder.
Cartridge Cleaning
Pool Filter System cartridge cleaning restores flow by removing oils, fine debris, and gunk that a cartridge traps in its pleats. Unlike backwashing a sand filter, this is hands-on: you physically remove the cartridge and clean it, which is messy but very doable.
A simple cleaning routine looks like this:
- Turn off the pump and relieve pressure using the air relief valve (if your filter has one).
- Open the filter housing and remove the cartridge(s).
- Rinse thoroughly with a strong hose spray, working top to bottom and separating pleats as you go.
- Reassemble and restart the system, then note your new clean baseline pressure.
When do you clean? Same logic as always: when filter pressure climbs ~8–10 psi above baseline or when water circulation at the returns noticeably weakens. If the pool looks hazy even though your sanitizer is on point, a dirty cartridge is a prime suspect because it reduces effective flow and filtering power right when you need it most.
There are also “levels” of cleaning, depending on what the cartridge is dealing with:
- Routine rinse: good for dust, pollen, and everyday debris.
- Deep clean (soak): better for oily buildup (think sunscreen and body oils) that a hose alone won’t fully remove.
Why bother doing it right? Because clean cartridges keep flow high, which makes skimming work better, improves distribution of sanitizer, and reduces strain on the pump. In plain terms: the Pool Filter System runs easier, your water stays clearer, and you’re less likely to chase problems with extra chemicals.
One more tip that feels almost too simple: don’t let a cartridge dry out completely while it’s filthy. Dried-on debris can cling to pleats like it paid rent, making your next cleaning session longer than it needs to be.
DE Filter Cleaning
Pool Filter System DE filter cleaning removes built-up debris from the grids (or fingers) that trap extremely fine particles using diatomaceous earth (DE). DE filters can deliver excellent clarity, but they demand a little more respect in the maintenance department—mainly because you’re managing both the filter internals and the DE itself.
Signs your DE filter needs cleaning:
- Filter pressure rises ~8–10 psi above clean baseline
- Return flow weakens and water circulation feels sluggish
- You notice cloudy water that doesn’t improve even with adequate runtime
Tools you’ll typically want on hand:
- A hose with a spray nozzle
- A DE scoop/cup (for recharging after cleaning)
- Basic hand tools for the clamp or bolts (depends on your filter model)
- Optional but helpful: a soft brush for stubborn debris
A common cleaning workflow is:
- Turn off the pump and open the air relief to drop pressure to zero.
- If your system supports it, backwash first to remove a big portion of used DE and debris (not all DE filters backwash the same way, so follow your valve positions carefully).
- Open the filter tank and remove the grid assembly.
- Hose off the grids thoroughly, spraying between folds to remove old DE and trapped dirt.
- Inspect the grids for tears or cracks (a small rip can let DE blow back into the pool, which is a classic “why is there powder on the floor?” mystery).
- Reassemble the filter and restart the pump.
- Recharge with fresh DE according to your filter’s requirement, because running without DE can reduce filtering performance and can stress the grids.
Here’s the important detail: with a DE filter, cleaning is only half the job—you also need the correct DE recharge afterward so the filter can actually do what it’s designed to do. If you restart without re-adding DE (or add far too little), clarity usually suffers. If you add too much, filter pressure can run high and restrict water circulation.
If pressure climbs quickly again right after a thorough cleaning, treat that as a signal to check for underlying causes (like heavy debris load, algae, or a grid issue) rather than just repeating the same clean-and-recharge loop.
Chemical Treatments
Chlorine and Alternative Sanitizers
Chlorine Pool systems kill germs fast and keep day-to-day water safe when the sanitizer level stays in range. That is the whole point of “sanitizing” (not just making water look pretty): chlorine in its active form attacks bacterial contamination and breaks down organics like sweat, sunscreen, and the stuff nobody wants to think about. The important detail is that chlorine works best when your water balance is not fighting it—if pH and alkalinity drift, you can end up “adding chlorine” without getting the sanitation you paid for.
So what are your options if a classic Chlorine Pool routine feels too hands-on? A Bromine Pool is the most common alternative sanitizer setup, and it is popular in warmer water (think spas) because bromine stays more stable at higher temperatures. Building on that, bromine tends to be gentler on smell and irritation for some swimmers, but it can be a little less punchy in full sun and it usually costs more to maintain. A Salt Water Pool is not “chlorine-free” (surprise); it uses a salt chlorine generator to produce chlorine steadily from dissolved salt. The benefit is consistency—your sanitizer level is often easier to hold because the pool is producing small amounts continuously instead of relying on big manual doses.
Here’s the key part: whichever route you pick, treat sanitizers like a system, not a single product. A Chlorine Pool that cannot hold a sanitizer level usually has a water balance issue (pH drifting high, stabilizer problems, heavy bather load), not a “bad chlorine” issue—often the stabilizer in question is Cyanuric Acid, which helps protect chlorine from rapid breakdown in sunlight. And a Salt Water Pool that suddenly feels harsh is often overdosing production time or running with pH creeping up, not “too much salt.” The same logic applies to a Bromine Pool: when it struggles, the fix is often better testing and steadier dosing, not random extra tablets.
If you want one beginner-friendly habit that prevents most headaches, it is this: test first, dose second, and never mix chemicals (even “safe” ones) in the same container. Pool chemistry has a sense of humor you do not want to meet.
Shock Treatment
Shock treatment clears out what regular sanitation cannot handle fast enough, especially after heavy use or when the water starts acting “weird.” Think of shock as the reset button for your pool’s sanitizer level: it rapidly oxidizes built-up organics (chloramines in a Chlorine Pool are a classic culprit) and helps regain control after a party weekend, a storm, or that first heatwave where everyone suddenly discovers your backyard.
The “when” is usually easier than the “how.” Shock is most useful when you notice any of these: persistent chlorine smell, irritated eyes despite testing, cloudy water that does not improve with filtration, or early signs of algae (a slick green film loves a low-sanitizer moment). It is also a smart move after a confirmed bacterial contamination event (for example, if the pool was used while sanitation was clearly off), because you want oxidation power on your side, not wishful thinking.
Types of shock generally fall into two practical buckets for beginners: chlorine-based shock (fast sanitation boost) and non-chlorine shock (oxidizer that supports your sanitizer rather than replacing it). A Chlorine Pool often uses chlorine shock to raise free chlorine quickly, while a Salt Water Pool might still need periodic shock because generators are designed for steady maintenance, not emergency cleanup. A Bromine Pool typically uses an oxidizer to “activate” bromine again, which is why bromine owners talk about shocking even when bromine is their main sanitizer.
Application matters more than brand names. Add pool shock when circulation is running, keep the product dry until use, pre-dissolve only if the label allows it, and avoid tossing different chemicals into the same skimmer like it is a smoothie blender. The payoff is simple: a proper shock gets you back to stable water balance and a predictable sanitizer level, which is exactly where beginners want to live.
Algaecide Use
Algaecide stops algae from taking over when prevention slips, but it should not be your first line of defense. Algae is usually a symptom—low sanitizer level, poor circulation, or water balance drifting out of range—so an algaecide works best as backup, not as a substitute for sanitation. If a Chlorine Pool is consistently sanitized and filtered, algae has a hard time getting comfortable.
So when does algaecide make sense? The most common scenarios are: you are opening after downtime, you are dealing with recurring algae despite “normal” chlorine readings, you are heading out of town and want extra insurance, or you are cleaning up after algae has already started (green, yellow/mustard, or black spots). The important detail is that visible algae usually means you also need oxidation help; many beginners add algaecide alone and wonder why the bloom keeps coming back. Algaecide can inhibit growth, but it does not magically remove the organic load that is feeding the problem.
There are different types, and the label tells you how they behave. Some algaecides are designed for routine prevention at low weekly doses, while others are intended for active treatment at higher doses when algae is present. A few formulas can foam (not ideal if you like your pool to look like water, not a bubble bath), and some contain metals that can stain if your water balance is off. Yes, pool chemistry loves consequences.
Correct application is boring—and that is why it works. Brush first to break up algae’s grip, run the pump to distribute evenly, dose according to volume, and keep filtration going so dead algae can be captured. This applies whether you run a Chlorine Pool, a Salt Water Pool, or a Bromine Pool: algae does not care about your preferred sanitizer brand, it cares about gaps in sanitation, circulation, and consistency.
Clarifiers and Enzymes
Clarifiers bind tiny particles into larger clumps so the filter can catch them, while enzymes digest oily gunk that clouds water over time. That division is the easiest way to remember when to use which: clarifiers are for “I can’t filter this because it’s too fine,” and enzymes are for “my water keeps getting dull because organics keep building up.” Neither replaces proper sanitizer level, and neither fixes bad water balance, but both can make a well-maintained pool look like it belongs in a brochure.
Clarifiers are most useful when water is hazy even though your sanitizer level tests fine and your filter is running. The mechanism is simple: a clarifier acts like a molecular “magnet,” helping micro-particles collide and form filterable chunks. The key part is dosing—too much clarifier can backfire and create its own cloudiness or gum up filtration, especially if the filter is already struggling. If your pool turns cloudy right after adding one, that is often a sign you overshot and now need time, circulation, and filtration (patience is also a chemical, apparently).
Enzymes, on the other hand, are slow-and-steady helpers. They break down oils from sunscreen, lotions, and body oils that can form scum lines and contribute to dull water. In a Chlorine Pool, that can reduce the workload on chlorine so it can focus on sanitation instead of constantly chewing through organics. In a Salt Water Pool, enzymes can be a nice assist because the generator maintains chlorine gradually, and enzymes help prevent the “why does my water look tired?” problem that shows up between perfect test results. A Bromine Pool can benefit too, since organics are organics no matter which sanitizer you prefer.
Potential drawbacks are mostly about expectations. Clarifiers do not remove algae by themselves (they might help you filter dead algae after proper treatment), and enzymes will not instantly clear a neglected pool. Used at the right moment—with balanced chemistry, good filtration, and stable sanitizer level—clarifiers and enzymes are the polish that turns “safe enough” into “sparkling.”
Algae and Water Clarity Troubleshooting
Algae Prevention
Pool Water stays algae-free when chemical level, circulation, and routine cleaning work together (not in isolation). Algae is basically an opportunist: give it warm water, sunlight, nutrients from debris, and a few “lazy” days in maintenance, and it moves in like it pays rent.
The key part is keeping your water balanced and moving. A perfect chemical level on paper won’t help much if dead zones exist behind ladders, steps, or in corners where circulation is weak. On the other hand, great circulation can’t compensate for sanitizer that’s consistently too low. So your best practice trio looks like this:
- Maintain sanitizer and pH in a steady range (consistency beats “big fixes”). Rapid swings invite problems because algae can bloom in the gaps between corrections.
- Run circulation long enough to match conditions. Hot weather, heavy pool usage, and lots of leaves or dust increase demand, so your pump runtime often needs to go up with them.
- Keep surfaces and baskets clean. Brushing breaks algae’s grip before it becomes a visible colony, and removing debris reduces the organic “food” load that eats up sanitizer.
Environmental factors matter more than most beginners expect. A shaded pool can still grow algae if circulation is poor, while a sunny pool can stay clear if the chemical level and flow are stable. Usage frequency matters too: more swimmers means more sunscreen, sweat, and fine particles—so the same settings that worked last week might fall short during a busy weekend.
Equipment checks are your quiet superpower here. Confirm the pump is actually pushing strong return flow, and make sure the Pool Filter System isn’t overdue for cleaning. If filtration is struggling, algae prevention becomes a game of whack-a-mole because the water never fully “turns over” and clears out microscopic starters.
Cloudy Water
Pool Water turns cloudy water when particles stay suspended instead of being filtered out or chemically broken down. The annoying part is that cloudy water is not one single problem—it’s a symptom, and the fix depends on what’s causing the haze.
Start with a quick, practical diagnosis (think: rule out the obvious before you start dumping products in):
- Check circulation at the returns. Weak flow points to a pump issue, clogged baskets, a dirty filter, or valves set incorrectly. If the water isn’t moving, the filter can’t “catch” the fine stuff that creates cloudy water.
- Inspect the Pool Filter System condition. A filter that’s dirty or undersized can’t trap fine debris, and a filter that’s not seated correctly can let particles bypass. If your pressure/flow looks off compared to normal, treat that as a clue.
- Test chemical level (especially sanitizer and pH). Cloudiness often appears when sanitizer is low (organics start building up) or when pH drifts and reduces sanitizer effectiveness.
- Look for external contaminants. Wind-blown dust, pollen, lawn clippings, and swimmer load can overwhelm the system fast. A pool can look “clean” at the bottom and still be full of tiny suspended particles.
Corrective actions should match the root cause. If flow is weak, fix circulation first (clean baskets, confirm pump operation, address filter cleaning) because chemicals won’t clear water that isn’t being filtered. If filtration is fine but cloudiness persists after heavy use, treat it like a contamination load problem: remove debris, brush, and keep sanitizer consistent until the filter catches up. And if your test shows an imbalance, adjust in small steps—big chemical swings can create new clarity issues while you’re trying to solve the old ones.
A good mental model: cloudy water is like a room full of dust with the air purifier turned off. You can spray air freshener all day, but until the purifier (your circulation + filtration) runs properly, the haze hangs around.
Green Water
Pool Water turns green most commonly when algae takes hold and chlorination (or overall sanitizer strength) isn’t keeping up. Sometimes the water shifts from “a little dull” to “green” surprisingly fast, and that’s because algae growth is exponential once conditions are right—warm temps, sunlight, weak circulation, and inconsistent chemical level.
Immediate actions should focus on stopping the bloom and helping the system remove what’s already in the water:
- Confirm sanitizer is not lagging. Low effective chlorination is the usual trigger, so testing and correcting promptly matters more than guessing.
- Brush walls and floor aggressively. This knocks algae into the water column where sanitizer can reach it, and where the Pool Filter System can remove dead material.
- Run circulation longer and eliminate dead spots. Aim return jets to create a slow “spin,” and don’t ignore stairs, corners, and behind fixtures—algae loves low-flow pockets.
- Remove debris quickly. Leaves and organic buildup consume sanitizer and shield algae, turning your pool into a buffet with a roof.
Long-term solutions look a lot like prevention, but with stricter consistency. Keep circulation steady, keep the filter maintained so it can capture fine remnants, and treat every green-water episode as a signal to tighten the routine—not as a one-time accident. If green water returns after you “fix” it, that usually means one of two things is still true: circulation isn’t reaching everywhere, or the chemical level keeps dipping during high-demand periods (heat waves, storms, or heavy pool usage).
The important detail is that algae and clarity problems overlap. Cloudy water can be early algae, and green water almost always becomes cloudy during cleanup as dead algae turns into fine particles. That’s why the most reliable cross-section troubleshooting method is boring but effective: consistent testing, brushing, debris removal, and verifying your pump and filter are genuinely doing their job every single week.
Common Mistakes to Avoid
Circulation Gaps
Pool Water develops algae faster when circulation stalls. The important detail is that algae doesn’t need a “dirty-looking” pool to get started—it needs calm pockets where sanitizer and filtered flow don’t consistently reach.
Poor circulation creates dead zones (steps, corners, behind ladders, along the waterline) where algae can anchor, multiply, and then spread when the pump finally kicks back on. Building on that, weak movement also means the Pool Filter System can’t do its job well, because debris and fine particles never make it to the skimmer and main drain in the first place. You’re essentially asking the filter to clean what it can’t physically pull in.
Here’s what this looks like in real life: the water seems mostly fine, but you keep spotting green dust that “mysteriously” returns a day after vacuuming. That’s usually not a “bad filter” problem—it’s a circulation problem wearing a disguise.
To avoid this mistake, treat pump runtime like your pool’s daily heartbeat. Consistent pump operation times keep Pool Water moving through the Pool Filter System often enough that sanitizer distribution stays even, temperature layers don’t separate as much, and small contaminants don’t get the chance to settle and feed algae. On the other hand, running the pump randomly (or only when the pool looks off) is like brushing your teeth only when you taste something weird—technically reactive, practically ineffective.
A simple self-check helps: if you can toss in a small amount of debris and it takes forever to drift toward a skimmer, circulation is probably too weak in that area. Fixing circulation gaps early is cheaper than fighting an algae bloom later (and far less annoying).
Chemical Dosing Errors
Pool chemistry goes sideways when chemical dosing is guesswork. The key part is that an incorrect dose doesn’t just “miss the target”—it can push the chemical level into a range where other treatments stop working the way you expect.
Too little sanitizer leaves Pool Water underprotected, and algae takes the hint. Too much can irritate skin and eyes, fade surfaces, and make balancing the rest of the water feel like chasing your tail. And if you stack chemicals too quickly, you can cause short-term spikes and reactions that make test results misleading (the pool version of checking a thermometer while the soup is still boiling).
Calibrating chemical doses properly is the non-negotiable habit here. That means dosing based on pool volume and current test results, not based on vibes, capfuls, or what you added “last summer.” If you’re adjusting a chemical level, re-test after circulation has had time to mix everything evenly, because chemistry changes don’t always show up instantly across the whole pool.
Another common slip-up is impatience: adding one chemical and then immediately adding another because the reading still looks off. Waiting before adding different chemicals gives the Pool Water time to distribute and stabilize, and it reduces the chance of accidental overcorrection. Think of it like seasoning food—add, stir, taste, then decide. Dumping everything in at once is how you end up with a pot you can’t rescue.
If you want one guiding rule: measure first, dose second, wait third. Beginners who follow that sequence avoid most chemical dosing errors without needing a chemistry degree.
Surface Neglect
Pool surfaces grow algae and stains when brushing is “optional.” The important detail is that Pool Water can look crystal clear while algae is quietly starting a grip on walls, seams, and textured areas (especially anywhere circulation is weaker).
Algae doesn’t just float around politely waiting to be filtered. It clings. Once it attaches to plaster, vinyl, or tile lines, it gets harder for sanitizer to reach every bit of it, and it becomes more resistant over time. That’s why surface neglect often turns into the frustrating scenario where your chemical level tests “fine,” but you still get slippery spots or faint discoloration that keeps returning.
Regular scrubbing breaks that early attachment. It’s mechanical help for your chemistry—brushing lifts film and bio-growth into the Pool Water where sanitizer can actually contact it, and where the Pool Filter System can capture the debris after it’s dislodged. In other words, brushing turns “stuck dirt” into “movable dirt,” and movable dirt is the kind your pool can actually remove.
A practical example: if you only vacuum the floor but never hit the steps and waterline, you’re leaving prime real estate for algae. Those areas often get sunscreen residue, body oils, and warmer water—all of which make stains and algae more likely. Even if the pool looks perfect from across the yard, a quick brush around corners, steps, and the waterline keeps small problems from becoming weekend-ruining ones.
If you remember nothing else, remember this: clear water isn’t the same as clean surfaces. Scrub first, and you’ll fight fewer battles later.
Pool Maintenance Cost Breakdown
One-Time Equipment Costs
Pool equipment sets the baseline for your ongoing maintenance budget. Buy the right gear once, and your maintenance schedule gets easier (and cheaper) for years.
Start with the pool pump, because it’s the heart of circulation. Most residential pumps land around $300–$1,500, depending on size and whether you choose a variable-speed model. The important detail is that pumps don’t just move water—they power filtration, chemical distribution, and even features like waterfalls, so under-sizing can cost you in cloudy water and extra chemicals later.
Next comes the Pool Filters System, which is your “water-cleaning engine.” Expect $200–$1,200 for the filter unit itself, with costs shifting based on filter type and capacity. Pairing a solid filter with a properly matched pump is where a lot of new pool owners accidentally overspend (a high-flow pump pushing a small filter is basically asking for frustration).
A pool cover is the sneaky budget-saver that people skip and then regret. Covers usually run $100–$600 for basic options and $1,000–$5,000 for safety or automatic covers. The key part: a cover reduces debris, slows evaporation, and can cut heating demand—so it pays you back in chemicals, water, and energy.
Then there are the “supporting cast” items that make upkeep realistic: a manual vacuum or automatic cleaner ($100–$1,500) including an Automatic Pool Cleaner for hands-off weekly floor coverage, a skimmer net and brush set ($30–$150), and a quality test kit ($30–$200). You can absolutely piece this together slowly, but having the essentials on day one prevents that classic newbie loop: dirty water → panic chemicals → more problems.
Monthly Chemical Costs
Pool chemicals keep water safe, clear, and not-itchy. In most homes, monthly chemical spending typically falls in the $30–$150 range, depending on pool size, weather, and how strict your maintenance schedule is.
Essential chemicals, their purpose, and what they typically cost per month can look like this:
- Sanitizer (chlorine tabs/liquid/shock or equivalent): kills bacteria and prevents algae; often the biggest line item in the $15–$80/month range.
- pH increaser/decreaser: keeps pH in range so sanitizer works and swimmers stay comfortable; commonly $5–$25/month (often sold as pH Up and pH Down).
- Alkalinity increaser: stabilizes pH swings; often $5–$20/month.
- Calcium hardness control (increaser or reducer approach depending on your fill water): protects plaster/liners and helps reduce scaling/corrosion issues; often $0–$20/month (many months can be “as needed”).
- Algaecide or clarifier (as-needed add-ons): extra support during heat, storms, or heavy use; often $0–$15/month.
The big-ticket item is usually sanitizer—chlorine (tabs, liquid, or shock) or an alternative system that still requires some sanitizing backup. Sanitizer’s job is simple: kill bacteria and prevent algae. If your pool gets heavy sun or frequent use, you’ll go through more, and your costs drift upward fast.
Next is pH control, usually via pH increaser/decreaser. Here’s the key part: pH isn’t just a “number to chase.” Off-balance pH makes chlorine less effective, irritates skin and eyes, and can damage surfaces and equipment. A small pH issue can quietly turn into a big chemical bill because you’re forced to use more sanitizer to get the same result.
You’ll also commonly need alkalinity increaser (to stabilize pH), calcium hardness control (to protect plaster and reduce scaling), and an algaecide or clarifier as occasional “insurance.” Many beginners overuse these add-ons, so treat them like tools, not daily vitamins.
Testing supplies are part of the chemical budget too. Strips are cheaper, but liquid drop kits tend to save money over time because they’re more consistent (which means fewer “oops” corrections). A practical approach is to budget a steady monthly amount, then adjust after two or three months of real data—your pool will teach you its personality, whether you like it or not.
Energy Costs
Pool energy costs come from runtime, water temperature goals, and how efficient your equipment is. For most households, the pool pump is the main contributor, because it can run for hours per day to circulate water through the Pool Filters System.
Pump energy use depends heavily on motor type and speed. Single-speed pumps tend to cost more to operate because they run at full power every minute they’re on. Variable-speed pumps cost more upfront, but they’re often cheaper month-to-month because you can run longer at lower speeds and still keep water moving (which is what your filter and chemistry want).
Heaters can dwarf pump costs if you chase “bathwater warm” in a cool climate. Gas heaters warm quickly but can be pricey to run, while heat pumps may be more efficient but depend on air temperature. Either way, the mechanic is the same: every degree you add has to be paid for, and wind plus evaporation are basically your pool’s way of lighting money on fire.
Pool lights add less to the bill than pumps and heaters, but older incandescent-style bulbs can still be wasteful compared to LEDs. If you run lights nightly, switching to LED is one of those easy wins that doesn’t require changing your whole system.
To reduce energy costs, focus on three levers: runtime, efficiency, and heat retention. Dial in pump hours based on water clarity and filter pressure (not guesswork), choose energy-efficient equipment when replacing parts, and use a pool cover or solar cover to cut heat loss and evaporation. The payoff isn’t just the bill—stable circulation also supports more consistent chemistry, which keeps your maintenance schedule calmer.
Water Replacement Costs
Pool water replacement costs show up when you least want another bill. Typical triggers include leaks, major algae cleanups, high total dissolved solids (TDS) situations, or seasonal maintenance routines where partial draining is recommended for your surface or climate.
The cost itself depends on how your utility rates work (some areas charge more once you cross certain usage tiers). As a ballpark, a partial refill might be “annoying but manageable,” while a full drain-and-refill can become a meaningful expense—especially for larger in-ground pools. The sneaky part is that water replacement can also create follow-up costs: fresh water often changes pH, alkalinity, and hardness, which means you’ll spend extra on balancing chemicals right after refilling.
Leaks are the most painful scenario because you pay twice: once for the lost water and again for the chemicals that leave with it. If you notice unexplained water loss beyond normal evaporation, it’s worth investigating early, because slow leaks can scale into equipment strain and structural problems. (Yes, pool ownership is glamorous like that.)
Seasonal maintenance can also require water changes in certain regions—winterizing may involve lowering water levels, and spring openings sometimes start with a partial refresh if water quality fell apart over winter. The practical budgeting move is to set aside a small “water contingency” fund, because even a perfectly maintained pool can run into a refill event.
Professional Service Costs
Professional pool services convert your time into a predictable bill. For beginners, that trade can be worth it—especially while you’re learning your maintenance schedule and getting comfortable with testing and adjustments.
Routine cleaning service is the common entry point. Expect $80–$200 per visit depending on region and what’s included (skimming, vacuuming, brushing, emptying baskets, and basic chemical checks). Weekly service is typical during heavy-use seasons, while some owners shift to biweekly in cooler months. The important detail is consistency: regular service prevents small problems (like early algae) from turning into expensive recoveries.
Seasonal opening and closing services are another frequent cost. Many homeowners pay $150–$500 per opening/closing, with higher prices if there’s a cover install, winter plugs, antifreeze steps, or a messy spring cleanup. If you’re in a freeze-prone climate, a proper closing is less “optional convenience” and more “protect your equipment from cracking.”
Then there are repair and inspection visits: pump diagnostics, filter issues, leak detection, and equipment replacement labor. Service calls often start around $75–$150 just to get someone on-site, with parts and labor added on top. This is where having the right baseline equipment—especially a properly sized pool pump and Pool Filters System—quietly reduces long-term spending.
A hybrid approach works well for many new owners: hire pros for opening/closing and occasional deep cleans, and handle weekly basics yourself. You still save money, but you also have a safety net when the pool decides to act up right before a weekend party (because of course it will).
Key Considerations, Risks, and Safety
Chemical Safety and Burn/Inhalation Risks
Pool chemicals cause burns and lung irritation when they touch skin, splash into eyes, or release concentrated fumes in enclosed spaces. That sounds dramatic, but it’s also very preventable with basic chemical safety habits (and a little patience).
Chlorine products are the usual troublemakers. Liquid chlorine (often sodium hypochlorite) can bleach fabric and irritate skin, while chlorinating granules can kick up dust that you really don’t want to inhale. Acids used to lower pH (typically muriatic acid) are in a different league: they can burn skin quickly, and the fumes can sting your nose and throat—especially if you pour too fast or work downwind. Here’s the key part: most “chemical accidents” happen during handling, not after the chemical is already diluted in the pool.
Set yourself up like you’re doing a small lab task, not a casual backyard chore. Wear closed-toe shoes, chemical-resistant gloves, and eye protection; add a mask if you’re working with dusty products or strong fumes. Open containers outdoors, stay upwind, and never lean directly over a bucket while pouring (that’s the classic “one whiff and regret” moment). Keep clean water nearby for quick rinsing, and store chemicals in a cool, dry, ventilated area—separated and tightly closed—because heat and moisture can turn “stable product” into “mystery reaction.”
A simple rule that saves a lot of pain: add chemicals to water, not water to chemicals, when pre-dissolving is recommended. Sudden heat release and splashing is how people get burned, and it’s an especially common mistake with acids and concentrated products.
Mixing and Dosing Mistakes (What Not to Combine)
Pool chemicals react when mixed directly, and the worst reactions are fast, hot, and gassy. The important detail is that “mixing” doesn’t only mean pouring two bottles into the same bucket—using the same measuring cup, tossing products into the same skimmer, or adding one chemical right after another in the same spot can be enough to create a dangerous concentrated zone.
The most common high-risk combo for beginners is sodium hypochlorite (liquid chlorine) and acid. When those meet in a concentrated form, they can release toxic chlorine gas. Real-world version: you pour acid near a return jet, then “help it along” with a dose of liquid chlorine in the same area because you’re in a hurry. The pool water may be large, but the local plume is concentrated for a moment—and that moment is when fumes happen.
Dosing mistakes are the quieter cousin of mixing mistakes, but they still bite. Overdosing chlorine can spike sanitizer levels and trigger strong odor, eye irritation, and bleaching; overdosing acid can crash pH and make the water aggressively corrosive—literally more acidic than intended (equipment and skin both complain). On the other hand, underdosing leads to poor water quality and a cycle of “add more, more often,” which increases handling risk.
Practical guardrails:
- Never combine chemicals in the same container, even “just to dissolve them faster.”
- Don’t add acid and sodium hypochlorite back-to-back in the same location; separate by time and circulation.
- Use dedicated scoops/cups per chemical (label them), and keep lids and hands dry to avoid contamination.
- Add one product at a time with the pump running, and give the water time to mix before the next addition.
If you ever see hissing, heat, bubbling, or a sudden sharp “bleach” smell while handling chemicals, step away, get fresh air, and don’t try to “fix” the container with more water or more product.
Electrical and Pump Safety Near Water
Pool equipment mixes electricity, metal, and water, so electrical safety needs to be part of your routine—not an afterthought. Pumps, timers, lights, heaters, and even extension cords can become hazards if they’re wet, damaged, or improperly protected.
Start with the basics that prevent most accidents: keep hands dry before touching plugs, switches, breakers, or pump controls. Don’t stand in puddles while working on equipment pads, and don’t route cords where sprinklers, rain runoff, or backwash can soak them. That “temporary” extension cord setup is a classic oversight—especially when a vacuum or cover pump needs power “just for today,” for three weeks in a row.
On the equipment side, pumps and filters build pressure. If you open a clamp or lid without relieving pressure, you can get a sudden release of water and parts (and it’s startling at best, injuring at worst). Turn the system off before opening anything, and make sure the system is fully depressurized. If your filter has an air relief valve, use it; if it doesn’t, wait until pressure is clearly at zero and the system is quiet.
Here’s the key part: water doesn’t need to be a big splash to be dangerous. Condensation inside a timer box, a cracked pump cord, or a loose connection can do the job. If you notice buzzing, tingling sensations when touching rails or equipment, tripping breakers, burnt-plastic smells, or visible corrosion on electrical components, treat it as a stop-work signal. Shut power off at the breaker (not just the switch), keep people out of the water, and don’t “test it one more time.”
A good habit is to build a “dry work zone.” Lay down a dry mat, keep tools off wet concrete, and schedule electrical tasks when the pad is dry and daylight is good. Backyard maintenance is easier when you can actually see what you’re doing.
Water Quality Risks (Irritation, Illness, and When to Close the Pool)
Pool water quality affects health in two big ways: irritation from imbalanced chemistry and illness risk from insufficient sanitation. Clear water isn’t a guarantee of safety, and cloudy water isn’t just an aesthetic issue—it’s often a sign the pool isn’t keeping up with contaminants.
Irritation is the most common early warning. Burning eyes, itchy skin, or a rash after swimming can point to pH that’s out of range, sanitizer that’s too high, or water that’s struggling with combined chloramines (the “pool smell” people blame on chlorine, even though it often shows up when the water isn’t being managed well). If multiple swimmers complain at once, assume the pool needs attention before the next swim session.
Illness risk is where you need to be strict. Poor sanitation allows microbes to survive longer, and warm water plus heavy bather load is basically a perfect storm—conditions that increase the risk of a water-borne illness even when the water looks “mostly fine.”
Close the pool (no “just a quick dip”) when any of these show up:
- You can’t clearly see the bottom of the deep end (cloudiness reduces visibility, and that’s a safety issue even before it’s a health issue).
- The water has visible algae growth or slimy surfaces.
- Multiple swimmers report irritation symptoms immediately after swimming.
- You’ve recently made a major chemical correction and the water hasn’t fully circulated/mixed yet.
- There’s fecal/vomit contamination or a suspected contamination event (treat as an immediate closure and follow proper cleanup guidance).
A practical example: if the water is dull and you keep “topping up” sanitizer daily, you’re chasing demand instead of fixing the cause (filtration, circulation, testing accuracy, or hidden organics). Pause, test carefully, correct in steps, and let the system circulate. The safest pool is the one you don’t have to panic-dose.
Environmental and Drain/Discharge Rules
Pool draining affects the environment and your property when it’s done casually, so local rules matter more than most beginners expect. Many areas restrict where pool water can go because chlorine, low/high pH, salt (in saltwater pools), and algaecide residues can harm storm drains, streams, landscaping, and even wastewater systems.
Building on that, the “where” is only half the story—the “when” matters too. Discharging heavily chlorinated water or very low-pH water is both a chemical safety concern and an environmental one. It can burn grass, damage soil biology, corrode metal drains, and stress municipal infrastructure. Even if you’re draining onto your own yard, too much flow can cause erosion or flood a neighbor’s property (and that quickly becomes a different kind of problem).
Safer, more responsible habits look like this:
- Check your city/county guidance before draining (storm drain vs sanitary sewer rules vary widely).
- Never discharge into a storm drain unless local regulations explicitly allow it.
- Avoid draining when the water has recently been heavily treated; give the pool time to return to normal levels and circulate.
- Drain slowly to control erosion and prevent water from running onto sidewalks, streets, or neighboring lots.
- Use a proper discharge hose path, and keep it away from septic systems, crawlspaces, and foundations.
If you’re unsure, treat “I’ll just send it to the street” as the wrong default. A quick call to the local utility or a pool service company can save you fines, property damage, and a lot of awkward conversations.
When to Call a Professional
Pool professionals solve problems that are risky, structural, or expensive to get wrong, and that’s worth using when the situation crosses from “maintenance” into “repair” or “hazard.” You don’t need to outsource everything, but you do want to recognize the moments where expertise is the safety feature.
Call a professional if you run into any of the following:
- Electrical issues: breakers tripping repeatedly, burnt smells, water inside electrical boxes, malfunctioning lights, or any tingling sensation around water (electrical safety first, always).
- Persistent water quality failure: recurring algae, chronic cloudiness, or sanitizer demand that won’t stabilize after you’ve tested accurately and corrected step-by-step.
- Pump/filter problems: leaks at seals, loud grinding, air sucking into the system, a filter that won’t hold pressure correctly, or any sign you can’t safely depressurize the system.
- Chemical incidents: accidental mixing, strong fumes, spills on skin/eyes, or any event that suggests exposure risk or contaminated containers.
- Structural or hydraulic concerns: cracks, suspected suction-side leaks, main drain/line issues, or unexplained water loss that isn’t simple evaporation.
- Draining questions with legal implications: uncertainty about discharge rules, or a drain plan that could affect storm drains, neighbors, or foundations.
Here’s the key part: calling a pro isn’t “giving up,” it’s choosing the low-risk path when the downside includes injury, property damage, or a pool that’s out of commission for weeks. Beginners get good fast when they stay safe long enough to learn.
FAQ
How long should the pump run each day?
Pool Water needs 8–12 hours of circulation per day as a typical baseline for most beginner setups. That run time keeps the Pool Filter System doing its two core jobs: moving water past the skimmer and pushing enough volume through the filter so debris and fine particles don’t just “camp out” in the corners.
Building on that, the important detail is that pump time is not a fixed number—it’s a knob you adjust based on temperature and how hard your pool is being used. Warm weather speeds up algae growth and makes sanitizer get consumed faster, so more circulation helps your sanitizer level do its work evenly instead of leaving “dead zones.” Heavy use (kids, parties, lots of sunscreen) adds oils and organics, which means your filter loads up faster and your chlorine has more to burn through. In those weeks, pushing closer to 12 hours (or splitting into two blocks, morning + late afternoon) usually gives you steadier water balance.
On the other hand, cooler weeks and low bather load let you trim time back toward 8 hours without sacrificing clarity. A simple sanity check: if you’re seeing debris floating past the skimmer, cloudy water by evening, or inconsistent Test Kit readings between shallow and deep end, circulation is telling you it wants more runtime. Not glamorous, but it’s cheaper than fighting a green pool later.
How often should pool water be tested?
Pool Water benefits from frequent water testing, and pH level plus sanitizer level should be your top priorities. If you only have the attention span for two numbers (no judgment), those are the ones that prevent the most common beginner headaches: itchy water, scale, cloudy water, and chlorine that “mysteriously” stops working.
Here’s a practical maintenance schedule that fits real life with a Test Kit:
- pH level and sanitizer level (chlorine/bromine): test often—daily during hot spells or heavy use, and several times per week when things are stable. These move fast.
- Total alkalinity (buffer): test weekly, and any time pH seems to bounce around even after adjustments.
- Other balance checks (as your kit allows): test weekly or after big events (storms, big parties, lots of refill water).
Here’s the key part: testing isn’t just about numbers, it’s about trends. If your sanitizer level drops faster than usual, you don’t only add more sanitizer—you also look for the cause (more sun, more swimmers, dirty filter, or simply not enough circulation). Your Test Kit is basically your pool’s “check engine light,” except you can fix the issue before it gets expensive.
When should the filter be cleaned?
Pool Filter System cleaning should happen when the filter pressure rises above its normal clean starting point or when flow drops noticeably. That pressure gauge is not decoration; it’s the simplest “tell” that your filter is full of captured debris and needs attention.
The mechanism is straightforward: as the filter traps more gunk, water has a harder time pushing through, so pressure climbs and circulation suffers. Poor circulation then makes everything else harder—skimming weakens, Pool Water mixes less evenly, and water balance can drift because chemicals aren’t distributing well.
Scheduling depends on filter type (because the cleaning method and capacity differ):
- Cartridge filters: clean when pressure rises and on a regular cadence during peak season, since cartridges clog with fine debris and oils.
- Sand filters: backwash when pressure rises; sand handles a lot but still needs routine backwashing to restore flow.
- DE filters: backwash/clean when pressure rises; DE systems filter very fine particles, so they can load up quickly during algae or heavy debris periods.
A good beginner habit is to note your “clean pressure” right after a proper cleaning. Then you’re not guessing—you’re comparing. If your pool suddenly looks dull even though your Test Kit numbers are fine, a dirty filter is often the missing piece of the puzzle.
How often should shock be used?
Pool Water should be shocked about once per week as a common routine, with extra shock treatments used when specific warning signs show up. Shock is basically a reset button for your sanitizer level’s workload: it burns through built-up organics that regular daily chlorination can struggle to keep up with.
Outside the weekly rhythm, shock is smart when you notice:
- Cloudy or dull-looking water even though the pH level seems reasonable.
- A strong “chlorine smell” (often a sign of combined chloramines, not “too much chlorine”).
- After heavy bather loads (pool party weekends, lots of sunscreen).
- After storms, wind, or visible debris events that dump contaminants into the pool.
- Early algae hints (slippery walls, green tinge starting to appear).
The important detail is timing and follow-through: shock works best when your Pool Filter System can circulate for long enough afterward to distribute and filter out the byproducts. If you shock and then barely run the pump, you’re asking chemicals to do a job without giving them the tools. Not ideal.
Also, keep your Test Kit in the loop. Shocking can temporarily swing readings, so test, treat, circulate, then retest before you declare victory.
What water level should be maintained?
Pool Water should be kept high enough for the skimmer to pull consistently, because the skimmer is your pool’s “front door” for debris. Practically, that means maintaining a level that sits around the middle of the skimmer opening so the surface water actually funnels in instead of just drifting past.
Too low is where problems pile up fast. The skimmer starts sucking air, circulation drops, and the Pool Filter System can’t filter what it isn’t receiving. In worst cases, air in the system can make the pump lose prime (translation: it struggles to move water at all), and then your water balance becomes harder to maintain because chemicals aren’t mixing evenly.
Too high causes a different kind of frustration: the skimmer loses its “surface pull,” so leaves and oils hang around on top like they own the place. You’ll also notice weaker surface movement, which can lead to film, slower debris capture, and that annoying situation where you’re cleaning the pool more but getting less payoff.
A simple routine helps: glance at the skimmer line when you do water testing with your Test Kit. It takes five seconds, and it prevents the most avoidable circulation issues beginners run into.
What are the most important numbers to balance first?
Water balance should be built in a clear hierarchy: alkalinity first, pH level second, and sanitizer level last. This order saves time because each step affects the next—especially alkalinity, which acts like the “shock absorber” for pH.
1) Total alkalinity: adjust this first because it stabilizes pH. If alkalinity is off, pH can swing up and down even when you think you’re correcting it. That’s how people end up in the classic beginner loop of “add chemical, test, panic, add more chemical.”
2) pH level: once alkalinity is in a reasonable zone, dial in pH. pH is about comfort and equipment protection, and it’s also about chemistry behavior: the water’s acidity and basicity determine how aggressive it is toward surfaces and how effective your sanitizer can be.
3) Sanitizer level (chlorine/bromine): set this after pH is under control so you’re not wasting sanitizer fighting chemistry. Sanitizer is your day-to-day protection, but it performs best when the rest of the water balance isn’t working against it.
Use a consistent Test Kit (not random strips one day and a different method the next), and retest after circulation has had time to mix everything. Pool chemistry is less like flipping switches and more like steering a boat: small corrections, steady direction, and fewer sudden moves.
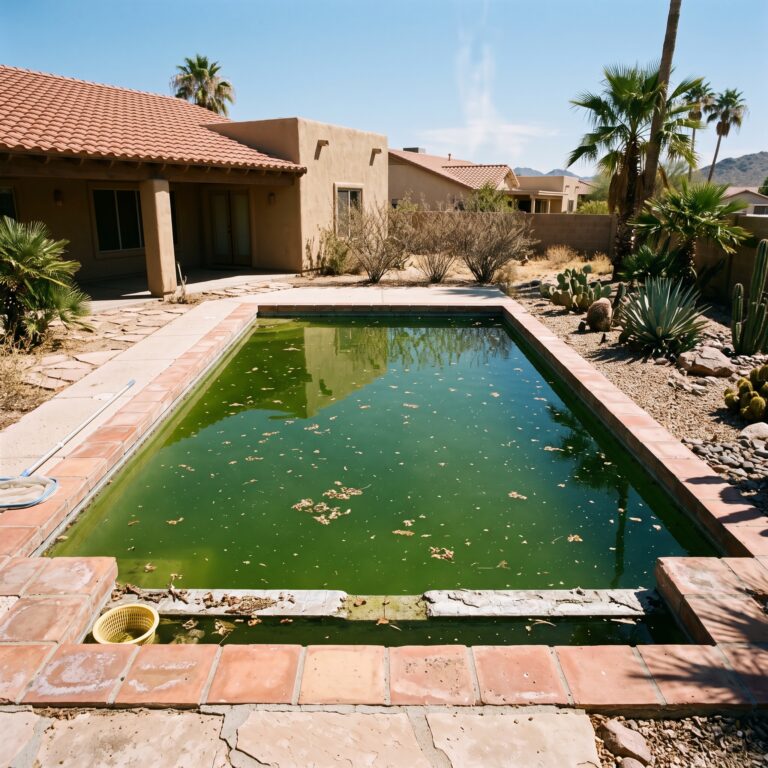
