
How to Winterize a Pool in Phoenix
Properly winterizing your pool is one of the most critical maintenance tasks you’ll perform as a pool owner. This comprehensive process goes far beyond simply throwing a cover over your swimming pool when temperatures drop, and many owners in Phoenix choose professional pool winterization services to protect their investment. Pool winterization protects your significant investment from costly freeze damage, preserves your pool equipment, and ensures a smooth reopening when warm weather returns. Whether you own an inground pool or an above ground pool, understanding the complete winterization process-including the specific needs of your climate zone-will save you thousands of dollars in potential repairs and make your life considerably easier come spring.
Understanding Pool Winterization: More Than Just Covering Your Pool
Many pool owners mistakenly believe that closing their pool for winter simply means draining some water and securing a cover. However, the pool winterization process is a comprehensive, multi-step procedure designed to protect every component of your pool system from the destructive forces of freezing temperatures and off-season neglect.
The fundamental difference between merely closing a pool and properly winterizing it comes down to thoroughness and intent. Closing your pool might involve basic steps like turning off the pump and placing a cover, but winterization encompasses balancing water chemistry, removing all water from plumbing lines, protecting equipment from freeze damage, and creating an environment that prevents algae growth and staining during months of inactivity.
According to pool industry data, improperly winterized pools can result in repair costs ranging from $500 for minor plumbing fixes to over $5,000 for extensive freeze damage repairs to pool structures and equipment. A pool cover alone cannot prevent water in your plumbing lines from freezing and expanding, potentially causing burst pipes, cracked filters, and damaged pump housings. During winter months, temperatures can fluctuate dramatically, and even regions that don’t experience sustained freezing can have occasional cold snaps severe enough to cause damage.
Professional pool winterization addresses three critical areas: water chemistry balancing to prevent corrosion and staining, complete removal of water from vulnerable plumbing and equipment, and physical protection through appropriate covering. Each element works together to maintain your pool’s condition throughout winter dormancy. Water chemistry must be adjusted to specific ranges that differ from summer maintenance because the pool won’t receive regular treatment or circulation. Pool equipment requires complete drainage and protection because even small amounts of residual water can freeze and cause catastrophic damage. The winter pool cover serves as the final barrier against debris, precipitation, and temperature extremes, but only when the underlying winterization steps have been completed properly.
Why Proper Winterization Matters to Your Wallet
The financial case for thorough pool winterization becomes crystal clear when you examine the cost of freeze damage repairs versus the investment in proper preparation. A comprehensive winterization, whether DIY or professional, typically costs between $150 and $500 depending on pool size and complexity. Compare this to the potential expenses of inadequate preparation. For many owners in Phoenix and East Valley, it’s more cost-effective to hire a local pool company for winterization than risk expensive repairs.
Burst plumbing lines from freeze damage commonly cost $800 to $1,500 to repair, requiring excavation, pipe replacement, and system testing. Cracked pool filter housings necessitate complete filter replacement at $300 to $1,200 depending on the type and size. Damaged pool pump motors and housings can run $400 to $1,500 for parts and labor. Pool heater repairs from freeze damage often exceed $1,000, and in severe cases may require complete unit replacement costing several thousand dollars. Structural damage to the pool itself—including cracked tiles, damaged skimmers, and fractured concrete or vinyl—can easily reach $2,000 to $5,000 or more for comprehensive repairs. To avoid these expenses, consider scheduling a professional winter pool closing service in Phoenix & East Valley.
Beyond immediate repair costs, improper winterization leads to significantly more expensive spring openings. Pools that weren’t properly winterized often face stubborn algae blooms requiring multiple chemical treatments and extensive cleaning, adding $200 to $400 to opening costs. Water that wasn’t properly balanced may have caused staining or scaling that requires professional treatment or even acid washing, another $300 to $600 expense. Equipment that suffered minor freeze damage may limp through one more season but fail prematurely, requiring earlier-than-planned replacement.
The cost-benefit analysis is straightforward: investing a few hundred dollars and several hours in proper pool winterization eliminates the risk of thousands in damage. Even if you hire professionals for the entire process, the peace of mind and damage prevention more than justify the expense. Pool equipment represents a significant investment—pumps, filters, heaters, and automation systems collectively cost thousands of dollars. Protecting these components through proper winterization is simply smart financial management.
When to Close Pool for Winter: Timing Is Everything
Determining the optimal time to begin your pool winterization process requires attention to several environmental factors, with water temperature serving as the primary indicator. The industry-standard threshold is when your pool water temperature drops to 65°F and consistently remains at or below this level. At this temperature, algae growth slows dramatically, making it the ideal time to close your pool while minimizing the chemical treatment needed to keep water clear through winter.
Temperature thresholds vary by region and climate zone. In northern states experiencing harsh winters-including the Northeast, Midwest, and parts of the Northwest-pool closing typically occurs in late September through mid-October. The weather in these areas turns cold quickly, and waiting too long risks an early freeze that can damage unprepared equipment. Central states with moderate winter climates usually winterize pools from mid-October through early November, when sustained temperatures below 65°F signal the end of comfortable swimming season.
Southern regions present more nuanced timing decisions. While some areas experience genuine winter requiring full winterization, others maintain temperatures that allow year-round pool use with modified maintenance. Understanding your specific climate zone and typical seasonal changes helps determine whether full winterization, partial winterization, or simple reduced-operation schedules make the most sense.
Beyond temperature, several practical considerations influence timing. If you’re no longer using your pool regularly and water temperature has dropped below 70°F, there’s little reason to continue running your pump and maintaining full chemical treatment. The costs of operation exceed the benefits of keeping an unused pool open. Additionally, consider your schedule—winterization takes several hours of focused work, so choosing a time when you can dedicate uninterrupted attention to the process ensures thorough completion, or you can schedule a professional pool closing appointment instead.
Many pool owners make the mistake of closing too early, while temperatures remain warm enough to support algae growth, necessitating excessive chemical treatment to prevent green water during winter. Others wait too long, risking freeze damage during an unexpected cold snap before winterization is complete. The 65°F sustained water temperature guideline, combined with attention to local weather patterns and forecast trends, provides a reliable decision framework.
Monitoring weather forecasts becomes particularly important in regions prone to temperature swings. A week of unseasonably warm weather in November doesn’t mean you should delay winterization-the pool winterization process itself takes time, and you need to complete it before any hard freezes occur. Planning to winterize when sustained daytime highs remain above freezing but nighttime temperatures approach 40°F provides an ideal working window.
Signs Your Pool Is Ready for Winter Closure
Beyond the 65°F water temperature threshold, several environmental and usage indicators signal that winterization timing is appropriate. When you notice consistent leaf fall in your area, it indicates seasonal changes have progressed to the point where maintaining an open pool becomes increasingly difficult. Daily skimming and cleaning become burdensome as trees shed leaves, and once the bulk of leaf fall has occurred, closing your pool prevents weeks of excessive debris accumulation.
Reduced daylight hours represent another clear seasonal change marker. As days shorten and the angle of sunlight changes, solar heating of your pool diminishes, making it increasingly expensive to maintain comfortable swimming temperatures even if you have a heater. When you find yourself running your heater constantly just to keep water at minimally acceptable temperatures, it’s a strong signal that the swimming season has naturally concluded.
Water temperature monitoring should become a daily habit as fall progresses. Using a reliable pool thermometer, check temperature at the same time each day, preferably in the morning before any sun exposure. When you observe three to five consecutive days of readings at or below 65°F, conditions are right for winterization. Some pool owners wait for water to reach 60°F, but this creates unnecessary risk in regions where sudden temperature drops can occur.
Weather forecast interpretation plays a crucial role in final timing decisions. Review extended forecasts looking for predicted cold snaps or frost warnings. If forecasters predict sustained below-freezing temperatures within the next 7-10 days, accelerate your winterization schedule regardless of current water temperature. The goal is completing all winterization steps, including plumbing line blow-outs and equipment drainage, before any risk of freezing.
Pool Winterizing Checklist: Essential Supplies You’ll Need
Successful pool winterization requires gathering all necessary supplies before you begin the process. Professional pool technicians organize their winterization toolkit into five categories: cleaning equipment, chemicals, plumbing supplies, equipment protection materials, and covering materials. Having everything on hand prevents mid-project trips to pool supply stores and ensures you can complete winterization efficiently.
Cleaning Equipment:
- Pool vacuum (manual or automatic) for thorough floor and wall cleaning
- Pool brush appropriate for your pool surface (nylon for vinyl, stainless steel for concrete)
- Telescopic pole for reaching all pool areas
- Leaf skimmer and debris net for surface and heavy debris removal
- Pool tile brush for waterline cleaning
- Garden hose for rinsing and filling as needed
Essential Chemicals:
- Pool shock (calcium hypochlorite or sodium dichlor) for pre-winterization super-chlorination
- Winter algaecide specifically formulated for extended effectiveness
- pH increaser or decreaser to achieve proper balance
- Alkalinity increaser for buffering capacity
- Calcium hardness increaser if needed for your water
- Enzyme treatment for organic material breakdown
- Test kit or test strips for water chemistry verification
Plumbing and Line Protection:
- Winterizing plugs sized for your pool’s return lines and skimmer (typically 1.5″ or 2″)
- Skimmer guard or gizzmo to protect skimmer from ice expansion
- Pool antifreeze (non-toxic, RV/marine grade, propylene glycol-based) – typically 2-3 gallons
- Teflon tape for ensuring tight plug seals
- Air compressor or shop vac capable of blowing out plumbing lines (minimum 5 CFM)
Equipment Protection:
- Absorbent plugs for pump and filter drain holes
- Manufacturer-specific drain plugs for your equipment
- Storage container for small parts and plugs
- Lubricant (typically silicone-based) for O-rings and gaskets
- Equipment covers or tarps for items remaining outdoors
- Towels and rags for cleaning and drying equipment
Pool Covering Materials:
- Winter pool cover appropriate for your pool type (solid, mesh, or safety cover)
- Cover pump for removing accumulated water and snow melt
- Water bags or cover weights for securing solid covers (avoid water-filled bags in freezing climates)
- Cover clips or cable and winch system for safety cover installation
- Air pillow for above-ground pools (sized appropriately for pool dimensions)
- Duct tape or patch kit for emergency cover repairs
Professional pool service companies often purchase complete winterization kits from suppliers, which include pre-measured chemical packets for standard pool sizes, appropriate winterizing plugs, and detailed instruction sheets. For DIY pool owners, these kits offer convenience and ensure you don’t overlook critical items. However, purchasing individual components allows customization to your pool’s specific needs and often proves more economical, especially if you already own cleaning equipment and have some supplies remaining from the swimming season.
Must-Have Chemicals for Winter Protection
Water chemistry forms the foundation of effective pool winterization, with specific chemicals serving distinct protective functions throughout the dormant season. Understanding not just what chemicals to add, but why each matters and how they interact, ensures your pool water remains balanced and your pool surfaces stay protected.
Pool shock serves as the primary sanitizer for pre-winterization super-chlorination. This process eliminates any organic contaminants, bacteria, and algae spores present in the water before closing. Use calcium hypochlorite shock (cal-hypo) at a rate of 1 pound per 10,000 gallons to achieve super-chlorination levels of 10-12 ppm free chlorine. Allow the shock to circulate for 12-24 hours before adding other winterizing chemicals, as chlorine breaks down organic material and clears the water, creating a clean slate for winter protection.
Winter algaecide represents the most critical winterizing chemical. Unlike regular algaecides used during swimming season, winter formulations are specifically designed to remain effective for 4-6 months without circulation or sunlight exposure. Quaternary ammonium compounds (quats) or polyquat algaecides work best for winterization, applied at approximately double the normal summer dosage—typically 32-64 ounces per 10,000 gallons depending on the product concentration. Adding winterizing algaecide after shocking prevents any algae growth during months of stagnant water.
pH balance requires adjustment to a range of 7.4-7.6 before closing. This slightly higher target than summer maintenance (7.2-7.4) helps prevent corrosion of metal components while avoiding scale formation from excessive alkalinity. Use pH decreaser (sodium bisulfate) if your pH tests above 7.6, or pH increaser (sodium carbonate) if below 7.4. Make pH adjustments gradually, testing and re-treating as needed to achieve the target range.
Alkalinity should be balanced to 100-120 ppm to provide buffering capacity that prevents pH drift during winter. Total alkalinity increaser (sodium bicarbonate) raises alkalinity levels, while dilute muriatic acid lowers them if necessary. Proper alkalinity stabilizes pH and protects pool surfaces from etching or corrosion over the long winter period.
Calcium hardness targets for winter vary by pool surface type. Plaster and concrete pools require 200-275 ppm calcium hardness to prevent etching of the pool surface. Vinyl and fiberglass pools should maintain 175-225 ppm. Calcium chloride raises hardness levels when needed, though many pool owners find their tap water naturally contains sufficient calcium. Low calcium hardness can cause aggressive water that leaches calcium from plaster, while excessive hardness promotes scale formation.
The proper sequence for chemical addition matters significantly. First, adjust total alkalinity to the proper range. Next, balance pH. Then perform shock treatment and allow full circulation for 12-24 hours. Finally, adjust calcium hardness if needed and add winter algaecide as the last chemical treatment. This sequence ensures each chemical functions optimally without interference from others, and allows adequate waiting time between incompatible treatments.
Deep Clean Before Winterizing
Beginning the physical winterization process with a thoroughly cleaned pool ensures that no organic debris remains to decompose and stain pool surfaces during months of inactivity. Professional pool technicians consider pre-winterization cleaning one of the most important steps, as any leaves, dirt, or algae left in the pool will break down over winter, consuming sanitizer, promoting staining, and creating a substantial cleaning challenge come spring.
Start with comprehensive surface skimming using a leaf net to remove all floating debris. Pay particular attention to corners, behind ladders, and around steps where leaves and debris accumulate. Even small amounts of organic material can cause problems over a long winter, so take time to remove everything visible on the water surface.
Next, thoroughly brush all pool surfaces-walls, floor, steps, and benches. Use a brush appropriate for your pool surface type: nylon bristles for vinyl liners and fiberglass to prevent scratching, or stainless steel bristles for concrete and plaster pools to effectively remove algae and biofilm. Brush from the top of the pool walls down toward the floor, using overlapping strokes to ensure complete coverage. This brushing dislodges any attached algae, dirt, or biofilm, suspending it in the water where your filter can remove it or your vacuum can collect it.
Pool vacuuming represents the most time-intensive cleaning step but proves essential for complete winterization preparation. Whether using a manual vacuum, automatic suction-side cleaner, or robotic vacuum, clean the entire pool floor methodically. Overlap your vacuum passes to ensure no spots are missed. Pay special attention to areas where debris naturally accumulates: the deep end, corners, around drain covers, and under skimmer openings. For pools with significant debris, you may need to vacuum to waste (bypassing the filter) to prevent overwhelming your filtration system with dirt and organic material.
The waterline requires particular attention because oils, lotions, and minerals accumulate at the water surface, forming a ring if left untreated. Use a specialized pool tile and vinyl cleaner with a tile brush or soft cloth to scrub the waterline clean. This prevents the ring from setting during winter and makes spring opening significantly easier. For stubborn waterline buildup, enzyme-based cleaners or diluted pool tile cleaner applied with a soft brush effectively removes deposits without damaging pool surfaces.
After completing the initial vacuum, allow your filter to run for several hours to capture any particles suspended by brushing. Then perform a second visual inspection of the pool, paying attention to previously problematic areas. If you notice any remaining debris or dirty spots, address them immediately. The time invested in thorough pre-winterization cleaning pays dividends in water quality preservation and ease of spring opening.
Balancing Water Chemistry for Winter
Achieving proper water chemistry parameters before winterization creates an environment that protects pool surfaces, prevents corrosion and scaling, and maintains water quality throughout the dormant season. Winter chemistry targets differ slightly from summer maintenance ranges because the pool won’t receive regular treatment, circulation, or sunlight exposure that normally help maintain balance.
Begin by conducting comprehensive water testing for all primary parameters: pH, total alkalinity, calcium hardness, and free chlorine. Use a reliable test kit or, preferably, take a water sample to a pool supply store for professional analysis. Accurate baseline readings allow you to make appropriate adjustments and avoid over-correction that could create new imbalances.
Total alkalinity should be your first adjustment priority, targeting a range of 100-120 ppm for winter. Alkalinity acts as a pH buffer, preventing wild swings in pH levels during months without circulation. If alkalinity tests below 100 ppm, add alkalinity increaser (sodium bicarbonate) according to product directions, typically 1.5 pounds per 10,000 gallons to raise alkalinity by 10 ppm. For alkalinity above 120 ppm, carefully add small amounts of muriatic acid to reduce levels, retesting after each addition to avoid overshooting your target.
Once alkalinity is properly balanced, address pH levels, aiming for 7.4-7.6. This range is slightly higher than typical summer maintenance (7.2-7.4) and helps prevent metal corrosion while minimizing scale formation risk. If pH tests below 7.4, add pH increaser (soda ash/sodium carbonate) gradually, allowing time for circulation and distribution between additions. For pH above 7.6, use pH decreaser (sodium bisulfate) following manufacturer recommendations. Always adjust pH after alkalinity because alkalinity changes affect pH levels.
Calcium hardness requires attention to prevent long-term pool surface damage. Target ranges vary by pool surface: 200-275 ppm for plaster/concrete pools, and 175-225 ppm for vinyl/fiberglass pools. Low calcium hardness creates aggressive water that can etch plaster or corrode metal fittings. Add calcium chloride to raise hardness if needed, typically 1.25 pounds per 10,000 gallons increases hardness by 10 ppm. Excessively high calcium requires dilution with fresh water or the use of sequestering agents to prevent scale formation.
Water testing after each adjustment confirms you’ve achieved target ranges before proceeding. Many pool owners make the mistake of adding multiple chemicals simultaneously, making it impossible to determine which adjustments were effective or excessive. The systematic approach-alkalinity first, then pH, then calcium hardness-ensures each parameter reaches optimal levels for winter protection.
| Parameter | Summer Range | Winter Range | Purpose |
| pH | 7.2-7.4 | 7.4-7.6 | Prevents corrosion and scale |
| Total Alkalinity | 80-120 ppm | 100-120 ppm | Buffers pH changes |
| Calcium Hardness (Plaster) | 200-400 ppm | 200-275 ppm | Protects pool surface |
| Calcium Hardness (Vinyl) | 175-250 ppm | 175-225 ppm | Prevents aggressive water |
| Free Chlorine | 1-3 ppm | 0-1 ppm (after shock) | Initial sanitization |
Adding Winterizing Chemicals
After achieving proper water chemistry balance, the final chemical treatment involves adding specialized winterizing products designed to protect your pool through months of dormancy. The sequence and timing of these additions directly impact their effectiveness and your pool’s condition come spring.
Pool shock treatment represents the first winterizing chemical application. Super-chlorinate your pool using calcium hypochlorite shock at a rate sufficient to achieve 10-12 ppm free chlorine-typically 1-2 pounds per 10,000 gallons depending on current chlorine levels and organic load. This high-level chlorination kills any bacteria, destroys organic contaminants, and eliminates algae spores that could proliferate during winter. Run your circulation system for a minimum of 12 hours after shocking, preferably 24 hours, to ensure complete distribution and allow the chlorine to do its work.
Winter algaecide should never be added until chlorine levels drop below 3 ppm, as high chlorine can interfere with algaecide effectiveness. Check chlorine levels after the shock treatment has circulated for 12-24 hours. Once levels are appropriate, add winter algaecide according to product directions-typically double the normal summer dosage. For a 20,000-gallon pool, this usually means 64 ounces of concentrated algaecide. Pour the algaecide around the pool perimeter with the pump running to ensure even distribution. Winter algaecides are specifically formulated to remain effective for 4-6 months without sunlight or circulation, using long-lasting quaternary ammonium or polyquat formulations.
Some pool owners opt to add enzyme treatments along with winter algaecide. Enzymes help break down oils, lotions, and organic debris that may be present despite thorough cleaning. While not absolutely essential, enzyme products can help maintain water clarity and reduce spring cleaning requirements. Add enzymes according to product directions, typically 16-32 ounces per 10,000 gallons.
Stain and scale prevention products deserve consideration if your pool is prone to metal staining or scale formation. Sequestering agents bind to metals and calcium, keeping them dissolved in the water rather than allowing them to precipitate onto pool surfaces. If your water source contains high iron or copper, or if you’ve had staining issues in the past, add a metal sequestrant according to product directions.
Allow all winterizing chemicals to circulate for at least 12 hours after addition, ideally 24 hours. This circulation ensures even distribution throughout the pool water and allows the chemicals to fully disperse before you shut down your filtration system. Never add pool cover immediately after chemical addition-always provide adequate circulation time first.
Step-by-Step Guide to Winterizing an Inground Pool
Winterizing an inground pool requires systematic attention to every component of your pool system, following a specific sequence that ensures protection from freeze damage while maintaining water quality. Professional pool technicians have refined this process through years of experience preventing costly damage and facilitating easy spring openings.
The complete inground pool winterization process encompasses ten essential steps, each building upon the previous to create comprehensive protection:
- Complete water chemistry balancing and shocking as detailed in previous sections, ensuring pH, alkalinity, and calcium hardness are within target ranges, and adding winterizing chemicals after proper circulation time.
- Clean and backwash your filter thoroughly, removing all debris and contaminants accumulated during the swimming season. For sand filters, perform an extended backwash followed by a rinse cycle. Cartridge filters should have cartridges removed, cleaned with a filter cleaner or hose, and either reinstalled or stored depending on manufacturer recommendations. DE filters require backwashing and either recharging or complete breakdown for winter storage.
- Lower water level to appropriate height, which varies by pool type and climate. For most inground pools in freezing climates, lower water to 4-6 inches below the skimmer opening. This prevents water from entering the skimmer where it could freeze and cause damage. Use a submersible pump for controlled water removal, monitoring level carefully to avoid over-draining.
- Drain all pool equipment completely, removing water from pump, filter, heater, and any other equipment. Remove drain plugs from pump housing, pump basket area, and filter tank. Store all drain plugs together in a labeled container. Many pool owners tape drain plugs to equipment or store them in pump basket to ensure they’re available in spring.
- Blow out all plumbing lines using an air compressor, the single most critical step for freeze protection. This process deserves detailed attention and is covered thoroughly in the following subsection.
- Install winterizing plugs in all return lines and skimmers, sealing them after line blow-out. Apply Teflon tape to plug threads for a water-tight seal. Insert a skimmer guard or gizzmo into the skimmer to absorb any ice expansion that might occur.
- Add pool antifreeze to plumbing lines that cannot be completely drained, particularly the main drain line and any inaccessible plumbing. Use only non-toxic, propylene glycol-based RV/marine antifreeze. Never use automotive antifreeze, which is toxic and can damage pool equipment.
- Remove and store pool accessories, including ladders, diving boards, handrails, solar blankets, and any removable cleaning equipment. Clean all accessories before storage. Store indoors if possible, or cover securely if they must remain outside.
- Protect pool equipment left in place, covering pump, filter, and heater with equipment covers or tarps to shield from moisture, ice, and snow. Ensure covers allow air circulation to prevent moisture accumulation that could lead to corrosion.
- Install winter pool cover securely, using appropriate installation method for your cover type. This critical final step protects all your winterization work and keeps debris out of the pool through winter months.
Each step requires careful attention to detail because skipping any component or performing steps inadequately creates vulnerability to freeze damage or water quality issues. The time invested in thorough winterization—typically 4-6 hours for a standard inground pool-prevents thousands of dollars in potential damage and ensures a much easier spring opening process.

Protecting Your Plumbing: The Crucial Blow-Out Process
Removing all water from pool plumbing lines represents the single most important freeze protection measure in the entire winterization process. Water expands approximately 9% when it freezes, generating tremendous force that easily cracks PVC pipes, bursts fittings, and damages expensive equipment. Professional pool technicians consider the line blow-out process non-negotiable in any climate that experiences freezing temperatures.
The blow-out process requires an air compressor capable of delivering sustained airflow at 60-80 PSI. Shop vacs work for some applications but typically lack the sustained pressure needed for thorough line clearing. Connect the air compressor to your pool’s plumbing system through the skimmer opening or a dedicated winterization port if your pool has one. Many professionals use a specialized rubber plug with an air fitting that seals into the skimmer while allowing air pressure connection.
Begin with return lines, which are typically the easiest to clear. With your pool’s multiport valve set to “waste” or “winterize” position (if available), introduce compressed air into the system. Watch return line outlets in the pool wall—you’ll see water spray from these jets as air forces it out. Continue air flow until you see only air bubbles, no water spray, coming from each return. This usually takes 1-2 minutes per return line. Once cleared, immediately install winterizing plugs in each return opening to seal the line and prevent water from re-entering.
Skimmer lines require more attention because they often have complex configurations with multiple connection points. Blow air through the skimmer line until you see bubbles in the pump basket area or at the skimmer itself. Some skimmer configurations make complete water removal challenging. For these situations, blow out as much water as possible, then pour 1-2 quarts of pool antifreeze into the skimmer to protect any remaining water from freezing. Install a skimmer gizzmo or winterizing plug to seal the skimmer and absorb any ice expansion.
Main drain lines present the most difficult challenge because they sit at the pool’s deepest point, making complete drainage through air pressure alone often impossible. After blowing as much water as possible from main drain lines, add pool antifreeze-typically 1-2 gallons depending on line length and diameter. Pour antifreeze through the skimmer or a dedicated main drain access point. Pool antifreeze is specifically formulated to remain liquid at temperatures well below freezing and protects any water that cannot be removed from plumbing lines.
Heater lines, if present, require careful attention. Consult your heater manufacturer’s winterization instructions, as different models have specific requirements. Generally, you’ll drain the heater completely using built-in drain plugs, then blow out connected lines. Some heaters have bypass valves that should be closed to isolate the heater from the main circulation system during winter.
Never exceed 80 PSI when blowing out pool lines. Excessive pressure can damage pipes, fittings, and equipment. The goal is sustained, moderate pressure that pushes water out through natural drainage and evaporation over several minutes, not explosive force that could crack pipes or blow out fittings.
Use only non-toxic, RV/marine grade pool antifreeze containing propylene glycol. Automotive antifreeze contains ethylene glycol, which is toxic to humans and animals and can damage pool equipment and surfaces. Pool antifreeze is formulated specifically for swimming pool applications and won’t harm pool components or water quality when diluted at spring opening. Calculate approximately 1 gallon of antifreeze per 10 feet of 1.5-inch pipe, adjusting for pipe diameter variations.
Lowering Water Level Correctly
Determining and achieving the proper water level for winter protects your pool’s skimmer while maintaining enough water to support the pool structure and prevent cover damage. The correct water level varies significantly based on pool type, cover type, and climate, making this seemingly simple step more nuanced than many pool owners realize.
For most inground pools in freezing climates using standard winter covers, lower water to 4-6 inches below the skimmer opening. This level prevents water from entering the skimmer where it could freeze and crack the skimmer body. However, don’t drain more water than necessary. Excessive draining can damage vinyl liners (causing wrinkles and shrinkage), stress pool structures (particularly in areas with high water tables), and create problems with pool covers that sag excessively without adequate water support.
Concrete and plaster pools tolerate water level variations better than vinyl-lined pools, but even these shouldn’t be drained more than 12 inches below normal levels unless absolutely necessary. Pools with tile at the waterline benefit from having water level just below the tile line to prevent freeze damage to tile and grout. Vinyl liner pools require extra caution—never lower water more than necessary because liners can pull from walls and develop permanent wrinkles when water support is removed for extended periods.
Safety covers with anchored attachment points may require different water levels than traditional winter covers. Consult your safety cover manufacturer’s instructions, as some designs work best with water levels closer to normal operating range while others specify reduced levels. The key is ensuring the cover can support snow and ice loads without the cover itself touching pool water, which could freeze and damage the cover material.
Use a submersible pump for controlled water level reduction. Position the pump at the desired final water level and allow it to run until it stops pumping, indicating water has reached pump level. Sump pumps work well for this application, as do small utility pumps available at hardware stores. Avoid using your pool’s main circulation pump to lower water level, as running the pump dry can damage the motor and impeller.
Discharge water from the pool appropriately, following local regulations. Many municipalities prohibit pool water discharge to storm drains, while others allow it under certain conditions. Consider directing discharge to landscaping areas that can benefit from the water, particularly if you haven’t recently shocked the pool and chlorine levels are low.
The water level should be stable at your target depth before installing the winter cover. Installing a cover on a pool while water is still draining can result in improper cover fit and tension once water settles at final level.
Winter Pool Cover Installation: Securing Your Pool
Selecting and installing the right winter pool cover represents the final critical step in protecting all your winterization work. Winter covers serve multiple functions: keeping debris out of the pool, preventing sunlight that promotes algae growth, protecting water chemistry, and providing safety barriers when properly installed.
Three primary winter cover types serve different needs and budgets. Solid winter covers block all light and prevent debris from entering water, but accumulate water, snow, and ice on their surface requiring a cover pump. These covers typically cost $100-$300 for standard sizes and work well for pools not requiring safety protection. Mesh safety covers allow water to drain through while blocking debris and providing ASTM-certified safety protection for children and pets. These premium covers cost $1,000-$2,500 installed but offer superior safety and eliminate standing water concerns. Hybrid covers combine solid centers with mesh edges, providing light blocking and debris protection while allowing perimeter drainage.
For standard solid covers, installation begins with ensuring your water level is correct and the pool deck is clean and dry. Unfold the cover on the pool deck beside the pool, oriented correctly with reinforced areas positioned over wider pool sections. With helpers (solid covers for large pools are heavy and unwieldy), carefully position the cover over the pool, centering it so equal overhang exists on all sides.
Secure solid covers using water bags or cover weights. If using water bags, fill them about 75% full to allow for ice expansion, and position them every 3-4 feet around the pool perimeter, placing them on the cover itself rather than the deck to prevent wind from getting under the cover. Never use concrete blocks or other hard materials as weights—they can damage covers and create safety hazards. In regions with severe winters, consider using cover seal (a rope and water bag system) that runs around the pool perimeter, providing superior wind protection.
Safety covers require professional installation initially to set permanent deck anchors, but owners can install and remove covers themselves in subsequent years. Installation involves positioning the cover correctly, then securing springs to deck anchors around the entire perimeter. Work progressively around the pool, attaching springs and adjusting tension to create tight, drum-like surface. Proper tensioning is critical—too loose allows sagging and debris accumulation, while too tight can damage the cover or anchors. Most safety covers include tensioning tools or instructions for achieving proper tautness.
After cover installation, install a cover pump if using a solid cover. Position the pump in the cover’s center where water naturally accumulates. Automatic cover pumps activate when water depth on the cover reaches approximately 1/4 inch and shut off when water is removed, requiring no manual operation through winter. Check the cover pump monthly to ensure it’s functioning properly and hasn’t become clogged with debris.
For above-ground pools, secure covers using cable and winch systems that came with the cover or pool. Thread the cable through cover grommets, tighten using the winch mechanism, and ensure even tension around the entire perimeter. Inspect above-ground covers regularly through winter because wind can more easily damage these covers, particularly if they haven’t been properly secured.
How to Winterize Above Ground Pool: Special Considerations
Above-ground pools require several winterization modifications compared to inground pools due to their structural differences, exposure to elements, and unique vulnerability to freeze damage. The fundamental winterization chemistry and equipment protection steps remain similar, but above-ground pools need additional protective measures to ensure pool walls, liner, and support structure survive winter conditions.
The most significant difference in above-ground pool winterization is water level management. While inground pools lower water 4-6 inches below skimmers, above-ground pools should maintain higher water levels to support pool walls and prevent structural damage. Lower water to just below the skimmer and return fittings-typically 3-4 inches below the bottom of the skimmer opening. Never drain an above-ground pool more than this amount; excessive draining removes the water pressure that keeps walls properly positioned and supported. Without adequate water support, above-ground pool walls can buckle, particularly when snow loads accumulate on the cover.
Air pillows serve a critical function in above-ground pool winterization that has no equivalent in inground pools. These inflatable devices, typically 4 feet by 8 feet for standard round pools (with smaller or larger sizes for different pool dimensions), float in the pool’s center and serve multiple protective purposes. Air pillows absorb ice expansion forces that would otherwise press outward against pool walls, potentially causing wall buckling or seam splitting. They also create a dome effect in the winter cover, preventing water and snow from accumulating in the cover’s center and putting stress on cover and pool walls.
Above-ground pool plumbing systems are typically simpler than inground systems but require equally thorough winterization. Most above-ground pools have minimal underground plumbing, with equipment positioned at pool height and visible hoses or pipes connecting components. This visibility makes the blow-out process easier but also increases freeze damage risk since exposed pipes have less earth insulation. Remove all hoses connecting pump, filter, and heater. Drain all equipment completely, removing drain plugs and storing them safely. For permanent plumbing installations, blow out lines and add antifreeze just as you would for inground pools.
Pool equipment for above-ground pools should be stored indoors whenever possible. Unlike inground pool equipment that may be partially below grade or in equipment sheds, above-ground equipment sits fully exposed to winter weather. Remove pump, filter, and heater if possible, storing them in a garage, basement, or shed. If equipment must remain outside, drain completely, remove all drain plugs, and cover with waterproof equipment covers or tarps secured to prevent wind damage. Even with covers, outdoor storage increases equipment vulnerability to freeze damage and corrosion.
Ladder systems in above-ground pools should be removed for winter. Most above-ground ladders simply lift out of deck mounts or pool wall brackets. Clean ladders thoroughly, allow them to dry completely, and store indoors or under cover. Leaving ladders in place can damage pool liners or walls during freeze-thaw cycles and creates safety risks if children climb on them while the pool is covered.
Winter cover selection for above-ground pools typically involves round or oval covers specifically sized to match pool dimensions. These covers attach using cable and winch systems that thread through grommets around the cover perimeter, then tighten to secure the cover against wind. Proper tensioning is even more critical for above-ground covers because wind can more easily get under these covers compared to inground installations. After installing the air pillow, position the cover over the pool, thread the cable, and tighten progressively around the pool to create even tension.
Using Air Pillows Correctly
Air pillow installation represents the most unique and critical aspect of above-ground pool winterization, yet many pool owners install them incorrectly or skip them entirely, creating unnecessary risk of pool damage. Understanding the air pillow’s multiple protective functions explains why proper installation matters so much.
Select an air pillow sized appropriately for your pool dimensions. Standard round pools up to 24 feet diameter use 4×8-foot pillows, while larger round pools and oval pools may require 4×10-foot or 4×15-foot pillows. The pillow should occupy approximately 10-15% of the pool’s surface area. Undersized pillows provide insufficient ice expansion protection, while oversized pillows can cause cover installation difficulties.
Inflate the air pillow to about 75% capacity—not fully inflated. Partial inflation allows the pillow to compress slightly as ice forms, absorbing expansion forces more effectively. A rock-hard, fully inflated pillow has no give and may puncture under pressure or stress the pool walls. Most air pillows have printed inflation guidelines showing proper firmness; when squeezed, the pillow should compress slightly but maintain its shape.
Positioning the air pillow in the pool’s center is crucial but can be challenging because pillows naturally drift to pool edges. Secure the pillow in the center using two methods: run rope or bungee cords from opposite sides of the pillow to opposite pool walls, creating an X-pattern that holds the pillow centered; or attach a small weight (like a chlorine puck in a floating dispenser) to the pillow’s center using fishing line, creating a gentle anchor that keeps it from drifting while still allowing it to move with ice expansion.
The air pillow must be in position before installing the winter cover. Once the cover is secured, the pillow creates a dome or tent shape in the cover’s center, causing rain, snow melt, and ice to slide toward the pool edges rather than accumulating in the middle. This weight distribution is critical—covers with standing water or snow loads in their center can collapse inward or create excessive stress on pool walls.
Some pool owners mistakenly believe air pillows are optional or only necessary in extremely cold climates. In reality, any climate that experiences freezing temperatures benefits from air pillow use. Even a brief hard freeze can create ice expansion forces sufficient to damage pool walls, and the air pillow provides insurance against this risk. Additionally, the dome effect preventing water accumulation on covers proves valuable even in mild climates prone to rain during winter months.
Inspect the air pillow several times during winter to ensure it remains properly inflated and centered. Wind, ice formation, or cover weight can shift pillows or cause slow air leaks. If you notice the pillow has deflated significantly, consider adding air if weather permits safe cover removal, or plan to replace the pillow the following season. A deflated pillow provides no protection and defeats the purpose of installation.
Regional Winterizing Approaches: Freezing vs. Mild Climates
Pool winterization is not a one-size-fits-all process, and climate plays a decisive role in determining which winterization procedures are necessary versus excessive for your specific situation. Understanding how regional temperature patterns, freeze frequency, and seasonal weather affect pool winterization allows you to tailor your approach while avoiding both inadequate protection and unnecessary work.
Pools in cold-winter climates—including the Northeast, Midwest, northern Rockies, and parts of the Pacific Northwest—require full, comprehensive winterization as described in previous sections. These regions experience sustained below-freezing temperatures for weeks or months, with frost depths reaching several feet underground. In these climates, skipping any winterization step creates substantial risk of freeze damage. Water must be removed from all plumbing lines, equipment must be drained completely, pool antifreeze is essential for lines that can’t be fully cleared, and heavy-duty winter covers are necessary to withstand snow loads.
Moderate-climate regions—such as the mid-Atlantic, lower Midwest, and Pacific Coast—face more nuanced decisions. These areas experience periodic freezes but also extended periods above freezing. Winterization in moderate climates should include all plumbing protection steps (line blow-outs, equipment drainage, antifreeze addition) because even brief severe cold snaps can cause damage. However, pool covers may not need to be as robust, and some pool owners maintain partial circulation during warmer periods if their pool has freeze protection systems that automatically run the pump when temperatures drop near freezing.
Mild-winter climates present the most diverse approaches. Regions like the Southeast, Southwest, southern California, and Gulf Coast may experience few or no freezes annually. In these climates, traditional winterization often proves unnecessary or even counterproductive. Instead, pool owners may choose from several approaches based on their specific situations and intended winter pool use.
For pools in Sun Belt regions that will continue limited use through winter, traditional closing may not occur at all. Instead, reduce circulation time to 4-6 hours daily (compared to 8-12 hours in summer), decrease chemical treatment frequency, and lower heater settings while maintaining enough warmth to prevent the rare freeze. This approach keeps the pool usable during warm spells while reducing operational costs during cooler months.
Even in mild climates, some level of winterization makes sense for pools that won’t be used regularly. Reduce water level slightly, balance chemistry, add winter algaecide, and install a pool cover to reduce debris accumulation and chemical consumption. However, complete equipment drainage and line blow-outs may be unnecessary except during rare severe weather events. Many mild-climate pool owners simply turn off equipment and cover the pool during the coolest 2-3 months, then resume normal operation when weather warms.
Climate-specific challenges require regional adaptations. Desert regions face dust accumulation and occasional rapid temperature swings rather than snow loads. Coastal areas deal with salt air corrosion and high humidity. High-altitude locations experience more intense UV exposure even in winter. Understanding your region’s specific climate challenges allows you to prioritize relevant protective measures while avoiding steps that don’t apply to your situation.
Mild Climate Winterization: The Arizona Approach
Pool owners in Phoenix, Scottsdale, Tempe, Mesa, and other Arizona communities face unique winterization considerations that differ dramatically from cold-climate protocols. With average winter temperatures remaining above freezing and many days reaching comfortable swimming weather, traditional pool winterization often proves unnecessary and counterproductive.
The primary decision Arizona pool owners face is whether to fully close the pool or maintain it in reduced-operation mode through winter months. For pools that will see occasional winter use during Phoenix’s pleasant 60-70°F December through February days, maintaining normal operation with reduced circulation makes the most sense. Run your pump 4-6 hours daily instead of summer’s 8-12 hours, continue regular chemical testing weekly, and reduce chemical consumption by 30-40% to match reduced bather load and evaporation.
For pools that won’t be used regularly during winter, a modified winterization approach balances protection with the reality of mild desert climate. Balance water chemistry to standard winter ranges (pH 7.4-7.6, alkalinity 100-120 ppm, calcium hardness 200-250 ppm), add double-strength winter algaecide, and install a pool cover to prevent debris accumulation from winter dust storms and occasional rain. However, skip the line blow-out, antifreeze addition, and equipment storage steps that freezing-climate pools require.
Arizona’s occasional hard freezes—which occur several times per decade when arctic air masses drop temperatures into the low 20s F for brief periods—deserve consideration despite their rarity. During these events, pools face genuine freeze risk if completely shut down. Many Arizona pool owners maintain their pool equipment’s freeze protection mode, which automatically activates circulation when sensors detect temperatures approaching 32°F. This automated protection prevents freeze damage during unexpected cold snaps without requiring constant monitoring.
Dust storms represent Arizona’s primary winter pool challenge, not freezing. Desert dust accumulates on pool covers, clogs cover pumps, and infiltrates pools at covers’ edges. Use tight-fitting covers with proper tensioning to minimize dust infiltration. Clean or replace cover pump filters monthly during dusty periods. Some Arizona pool owners actually run minimal circulation during winter rather than fully closing to prevent the dust and sediment accumulation that occurs in completely stagnant pools.
Water chemistry in Arizona’s hard water and high-mineral-content tap water requires attention even during winter. Calcium hardness tends to climb during periods of no water use, potentially leading to scale formation. Monitor calcium levels monthly even in closed pools, and consider partial water replacement in spring if levels climb excessively. The state’s intense sunshine, even in winter, can degrade chlorine and algaecides more rapidly than in cloudier climates, so test chemical levels periodically and supplement if necessary.
Protecting Your Pool Equipment During Winter
Pool equipment represents thousands of dollars of investment in pumps, filters, heaters, automation systems, and accessories. Proper winterization of this equipment prevents freeze damage, extends equipment lifespan, and ensures reliable performance when you reopen your pool in spring. Each equipment type requires specific winterization procedures based on its vulnerability to freeze damage and manufacturer recommendations.
The fundamental principle governing equipment winterization is simple: water expands when it freezes, and even small amounts of residual water can crack housings, damage valves, and destroy motor seals. Professional pool technicians approach equipment winterization with the assumption that any water remaining in equipment will freeze and cause damage, so thoroughness in draining and protecting equipment is never excessive.
Pool pumps require complete drainage of all water from the pump housing, impeller chamber, and basket area. Remove the pump drain plug (usually located at the bottom of the pump housing), pump lid, and pump basket. Turn the pump upside down or tilt it to ensure all water drains completely. Some water may remain trapped in impeller chamber seals; open the impeller access plate if possible to drain this area. Store drain plugs, O-rings, and small parts in a labeled container or tape them to the pump housing for easy location in spring.
Pool filters need type-specific winterization procedures. Sand filters should be backwashed thoroughly, then drained using the drain plug at the filter tank bottom. Leave the multiport valve in winterize position if available, or between two settings to prevent valve seal damage from frozen position. Cartridge filters require cartridge removal, cleaning, and either dry storage or reinstallation after thorough drying. Remove the filter tank drain plug to ensure complete drainage. DE (diatomaceous earth) filters should be backwashed, drained completely, and left with the tank drain plug removed for continued drainage and air circulation.
Pool heaters represent the most expensive equipment component and require careful winterization. Gas heaters must be drained completely using manufacturer-specified drain plugs (typically 3-5 plugs in various locations). Consult your heater’s manual for specific plug locations, as missing even one can result in freeze damage. Electric heat pumps require refrigerant line protection and complete water drainage from heat exchangers. Many professionals recommend professional heater winterization due to complexity and high replacement costs.
Chlorinators, salt systems, and chemical feeders need complete draining and cleaning. Remove all tablets or chemicals from feeders—chemicals left in equipment can corrode housings during long winter dormancy. Rinse feeders with clean water, drain completely, and leave lids open or partially open for air circulation that prevents moisture accumulation.
Automation systems, timers, and control systems should be powered down but protected from moisture and temperature extremes. Many professionals recommend leaving circuit breakers energized but disconnecting individual equipment to prevent accidental activation. This maintains power to freeze protection systems and time clocks while preventing equipment damage from accidental operation. Store wireless controllers and handheld devices indoors to protect battery life and electronic components.
For equipment that must remain outdoors through winter, use waterproof covers or tarps designed for equipment protection. Ensure covers allow air circulation to prevent moisture accumulation that can cause corrosion. Secure covers against wind using bungee cords or straps. Never seal equipment in completely airtight enclosures, which trap moisture and accelerate corrosion.
Winterizing Your Pump and Filter System
Pool pump and filter winterization deserves detailed attention because these components circulate thousands of gallons of water daily during swimming season, creating numerous areas where residual water can accumulate and freeze. A systematic approach ensures every area is properly drained and protected.
Begin pump winterization by shutting off power at the circuit breaker. Never drain equipment while power is connected—this prevents accidental motor activation that could damage dry-running pumps. Remove the pump drain plug, typically located at the pump housing’s lowest point. Water will drain from the pump housing, but significant water remains in the basket area and impeller chamber. Remove the pump lid by turning counterclockwise (most pumps) or releasing clamps. Remove the pump basket and dump any water and debris.
The pump impeller chamber contains water that won’t drain through the main drain plug. To access this area, locate the impeller access plate (usually on the pump’s front, requiring several screws removal) or tilt the entire pump backward so water drains out through the pump lid opening. Some pumps have secondary drain plugs specifically for impeller chamber drainage. Consult your pump’s manual for specific drainage points on your model. For variable-speed pumps with complex electronic controls, check manufacturer recommendations for winterization—some models have specific requirements for protecting electronic components.
Clean the pump basket, lid, and O-ring thoroughly before storage. Use a hose to rinse debris from the basket. Inspect the lid O-ring for cracks, tears, or compressed spots that could cause leaks next season. Lubricate the O-ring with pool equipment lubricant (silicone-based) to keep it pliable during winter storage. Store the lid, basket, and drain plug together—many pool owners place these inside the pump housing or basket area so they don’t get misplaced.
Filter winterization begins with thorough backwashing or cleaning appropriate for your filter type. For sand filters, backwash for 3-5 minutes until discharge water runs clear, then rinse for 1 minute. Set the multiport valve to “winterize” position if available, or position the handle between two settings to prevent the valve seal from being compressed in one position all winter, which can cause sticking or seal damage. Open the drain plug at the filter tank bottom and allow complete drainage. Some sand filters have additional drain points; consult your manual to ensure all water is removed.
Cartridge filters require cartridge removal for thorough winterization. Turn off the system, release pressure via the air relief valve, then remove the filter lid or clamps. Remove cartridge elements and spray them with a hose to remove debris. For thorough cleaning, soak cartridges overnight in filter cleaner solution, then rinse completely. Allow cartridges to dry thoroughly before reinstalling them in the filter or storing separately. Drain the filter tank using the bottom drain plug. Leave the lid slightly ajar or completely removed to ensure continued drainage and prevent moisture accumulation.
DE filters combine aspects of sand and cartridge filter winterization. Backwash thoroughly to remove all DE powder and debris. Remove the filter tank lid and inspect the filter grids, cleaning them with a hose and removing any caked-on DE. Inspect grids for tears or damage; damaged grids should be replaced before next season. Drain the filter tank completely using all drain plugs. Leave the tank lid removed or very loosely positioned to allow complete drainage and air circulation through winter.
Store all filter drain plugs, clamps, and small parts in labeled containers or tape them to the filter tank where they won’t be lost. Many pool service professionals use large zip-lock bags labeled with equipment names to store all parts for each piece of equipment together.
Preventing Costly Freeze Damage to Your System
Freeze damage to pool equipment and plumbing represents the most expensive consequence of inadequate winterization, with repair costs frequently exceeding $2,000 for comprehensive system damage. Understanding the specific vulnerabilities in your pool system and implementing targeted protection prevents these expensive repairs while ensuring equipment longevity.
Pool plumbing runs underground in most installations, providing some natural freeze protection from earth insulation. However, shallow plumbing runs, exposed pipe sections, and pipes in unheated equipment areas remain highly vulnerable. The freeze damage prevention strategy focuses on three principles: removing all water from pipes, protecting water that cannot be removed, and ensuring no water can re-enter drained systems.
The blow-out process detailed earlier removes most water from plumbing lines through sustained air pressure. However, some plumbing configurations—particularly main drain lines, spa overflow channels, and complex multi-port plumbing systems—make complete water removal impossible through air pressure alone. These systems require pool antifreeze protection. Use only RV/marine grade antifreeze containing propylene glycol, never automotive antifreeze with toxic ethylene glycol. Calculate antifreeze requirements based on pipe length and diameter—typically 1 gallon protects 10 feet of 1.5-inch pipe.
Add antifreeze through the skimmer or dedicated access points after blowing out lines. For main drain lines, pour 1-2 gallons of antifreeze into the skimmer and use the pool pump briefly to push antifreeze into the main drain line, or pour antifreeze directly into main drain access points if available. For spa drains and overflow lines, calculate antifreeze requirements based on specific line lengths and configurations.
Equipment housings—particularly pump housings, filter tanks, and heater heat exchangers—crack easily if any residual water freezes. After draining all accessible water, blow compressed air through equipment to remove moisture from hard-to-drain areas. For pumps, remove the impeller housing and use compressed air to blow out any water trapped in seal areas. For filters, use an air compressor attached to the air relief valve to force remaining water out through drain openings.
Skimmers represent particularly vulnerable components because they sit at water level and cannot be completely drained when maintaining proper winter water levels. Install skimmer guards (gizzmos) that thread into skimmer drain holes and compress if ice forms, absorbing expansion force that would otherwise crack the skimmer body. Alternatively, pour 1-2 quarts of antifreeze into the skimmer after lowering water level to protect any water that remains in the skimmer throat or equalizer line.
Freeze protection systems and frost sensors provide automated protection in mild climates that experience occasional freezes. These systems monitor air or water temperature and automatically activate pool circulation when temperatures approach freezing, preventing damage during unexpected cold snaps. In regions with occasional but not constant freezing weather, freeze protection systems allow pool equipment to remain plumbed and ready while maintaining freeze protection without full winterization.
Regular mid-winter monitoring provides additional protection in regions with unpredictable weather. Check winterized pools after any severe weather events—heavy snow, ice storms, or unusual cold snaps—to ensure covers remain secure, no equipment has been damaged by falling ice or snow loads, and winterizing plugs remain in place. This proactive monitoring allows you to address emerging problems before they cause extensive damage.
DIY Pool Winterizing: Common Mistakes and How to Avoid Them
Professional pool service companies regularly encounter pools damaged by well-intentioned but incomplete DIY winterization attempts. Understanding the most common errors and their consequences helps pool owners avoid expensive mistakes and execute winterization procedures correctly the first time.
Skipping the Line Blow-Out: The single most costly DIY mistake is failing to properly blow out pool plumbing lines, either skipping the step entirely or performing inadequate blow-outs that leave water in pipes. Pool owners without air compressors sometimes attempt to drain lines through gravity or shop vacs, neither of which remove enough water to prevent freeze damage. The solution: rent or purchase an adequate air compressor (minimum 5 CFM capacity), and blow each line until only air bubbles emerge from outlets. If you cannot properly blow out lines, this step alone justifies hiring professional winterization service.
Using Automotive Antifreeze: Some DIYers attempt to save money by using automotive antifreeze instead of pool-specific antifreeze. Automotive antifreeze contains ethylene glycol, which is toxic to humans and animals, can damage pool equipment and surfaces, and creates serious water contamination requiring complete pool draining and refilling in spring. Always use RV/marine grade pool antifreeze containing propylene glycol, which is non-toxic and specifically formulated for pool applications.
Inadequate Equipment Drainage: Many DIYers remove obvious drain plugs from pumps and filters but miss secondary drain points, leaving water in impeller chambers, multiport valve bodies, and heat exchanger sections. This residual water freezes and cracks housings. Solution: consult equipment manuals to locate all drain points, and tip or invert equipment when possible to ensure complete drainage. Store all drain plugs together in labeled containers to prevent loss.
Adding Chemicals in Wrong Sequence: DIY pool owners frequently add all winterizing chemicals simultaneously or in incorrect order, reducing chemical effectiveness and sometimes creating dangerous reactions. Adding algaecide while chlorine levels remain elevated can neutralize the algaecide, while adding alkalinity increasers and calcium simultaneously can cause cloudiness. Solution: follow the correct chemical sequence—balance alkalinity first, then pH, then shock, wait 12-24 hours, then add winter algaecide and other specialty chemicals.
Over-Draining the Pool: Concerned about freeze damage, some pool owners drain water far below recommended levels, creating different problems. Vinyl liners can shrink, wrinkle, and pull away from walls when water support is removed. Concrete pools in high water table areas can experience structural stress or even pop out of the ground when empty. Pools drained too far create excessive cover sag. Solution: follow specific water level guidelines for your pool type—typically 4-6 inches below skimmer for inground pools, just below skimmer/return fittings for above-ground pools.
Neglecting Cover Maintenance: DIY winterizers often install covers and forget about them until spring. Accumulated water and snow loads stress covers and pool walls, while torn covers allow debris into pools, negating winterization benefits. Solution: install cover pumps on solid covers, inspect covers monthly, remove excessive snow accumulation, and repair small tears immediately before they enlarge.
Forgetting Small Details: Professional winterization includes dozens of small steps that DIYers often overlook—removing ladders and accessories, lubricating O-rings, protecting fresh water fill lines, storing small parts systematically. These oversights create inconvenience and potential damage. Solution: use a detailed winterization checklist and work methodically through each item rather than relying on memory.
The most successful DIY winterizations occur when pool owners approach the task with adequate time, proper tools, detailed instructions, and realistic assessment of their abilities. Complex pools with extensive plumbing, expensive equipment, or unusual configurations often benefit from professional service even if you perform regular summer maintenance yourself.
Emergency Pool Winterizing: When You’re Running Out of Time
Weather forecasts sometimes provide little warning before the first hard freeze, leaving pool owners scrambling to protect unprepared pools from imminent freeze damage. While proper winterization should never be rushed, understanding which steps are absolutely critical allows you to perform emergency winterization that prevents catastrophic damage even when time is limited.
When you have 24-48 hours before predicted hard freezes, prioritize your efforts on freeze damage prevention over water chemistry perfection and complete aesthetic preparation. The emergency winterization hierarchy focuses first on protecting the most expensive and vulnerable components—plumbing and equipment—then addresses chemical treatment and covering.
Critical Priority 1 (Must Complete): Drain all pool equipment completely. Remove all drain plugs from pump, filter, heater, and any other equipment. Tip or invert equipment to ensure complete drainage. Store drain plugs immediately so you don’t lose them during rushed work. Remove pump lid and basket, dump water, and leave open to drain completely. If you have an air compressor, blow out equipment to remove residual moisture. This single step prevents most expensive freeze damage.
Critical Priority 2 (Must Complete): Blow out all plumbing lines using compressed air. Focus first on return lines and skimmer lines—these freeze most easily. Blow air through each line until only bubbles emerge from outlets, then immediately install winterizing plugs to seal lines. If you cannot access an air compressor immediately, this step justifies calling emergency professional service. The cost of professional emergency line blow-out ($150-300) is far less than plumbing repair costs ($800-2000+).
Critical Priority 3 (Must Complete): Add pool antifreeze to lines that cannot be fully blown out—primarily main drain lines and any complex plumbing that you’re uncertain about. Pour 1-2 gallons of RV/marine grade antifreeze into skimmers, main drain access points, and any other plumbing openings. Antifreeze provides insurance against incomplete blow-outs and protects lines you may have missed.
Priority 4 (Complete if Time Allows): Balance basic water chemistry—at minimum, check and adjust pH to 7.4-7.6 range, add pool shock to super-chlorinate, and add winter algaecide. If time is extremely limited, skip detailed chemical balancing and perform comprehensive chemistry balancing in spring, accepting that water quality may suffer but freeze damage is prevented.
Priority 5 (Complete if Time Allows): Install pool cover to protect from debris and extreme temperatures. Even a poorly secured cover provides some protection. If you don’t have a proper winter cover, use any available tarp or covering material temporarily until weather permits proper cover installation.
Can Skip Temporarily: Thorough pool cleaning, precise water level adjustment, ladder/accessory removal, and equipment storage. These tasks can be performed later during a warm spell or in spring, though performing them creates better overall winterization.
Emergency winterization isn’t ideal and may result in challenging spring openings, but it prevents the thousands of dollars in damage that results from equipment and plumbing freezing. Once the immediate freeze danger passes, revisit your pool during the next warm period to complete any skipped steps, particularly thorough cleaning and proper cover installation.
Professional emergency winterization services can perform critical freeze protection in 1-2 hours when contacted with adequate notice. Many pool service companies charge premium rates for emergency service but prevent damage that far exceeds service costs. If you cannot access an air compressor or feel uncertain about proper equipment drainage, professional emergency service provides essential protection.
Dealing with Winter Pool Cover Problems
Pool covers endure challenging conditions during winter months—snow loads, ice accumulation, wind stress, and temperature extremes that can tear covers, create sagging, or allow water accumulation that damages both cover and pool. Addressing these problems promptly prevents minor issues from becoming expensive repairs while maintaining the protection your cover provides.
Water Accumulation on Solid Covers: Standing water on pool covers is the most common winter cover problem. Rain, snow melt, and ice thaw can create pools of water several inches deep weighing hundreds of pounds. This weight stresses cover material, creates dangerous sagging that could allow people or pets to fall through, and can collapse covers into the pool. Install an automatic cover pump that activates when water reaches approximately 1/4 inch depth. Check cover pumps monthly to ensure they’re functioning—clogged intakes and dead batteries are frequent problems. Position the pump in the cover’s lowest point where water naturally accumulates.
Snow and Ice Loads: Heavy snow accumulation creates massive weight on pool covers—wet snow weighs approximately 20 pounds per cubic foot, and a 20×40-foot pool cover with 12 inches of wet snow holds nearly 2 tons. Remove snow before accumulation exceeds 6-8 inches using a soft push broom or pool cover snow rake. Never use sharp shovels or ice scrapers that can tear covers. For ice layers, allow natural melting rather than attempting to chip or break ice, which risks cover damage.
Cover Tears and Damage: Small tears in pool covers enlarge rapidly if not repaired. When you discover a tear, immediately apply cover patch tape as a temporary fix. Most pool supply stores sell waterproof patch tape designed for pool covers. Clean and dry the area around the tear, cut patch tape to extend at least 2 inches beyond the tear in all directions, and press firmly to ensure good adhesion. For vinyl covers, vinyl repair kits provide more permanent fixes. Plan to replace covers with extensive tearing—patchwork repairs rarely last more than one season.
Wind Damage and Loose Covers: Wind can work under improperly secured covers, causing billowing and flapping that tears cover material and unseats weights or anchors. Inspect cover tension after any severe wind event. For solid covers using water bags, ensure bags remain positioned on the cover material, not the deck—bags on the deck create gaps where wind enters. Add additional water bags in problem areas. For safety covers, check anchor springs for proper tension and re-tighten using tensioning tools if sagging develops.
Cover Degradation from UV and Weather: Pool cover material breaks down over time from UV exposure and weather cycling. Most quality pool covers last 3-5 years with proper care, but cheaper covers may degrade in 1-2 seasons. Signs of cover failure include widespread thin spots, brittleness, extensive cracking, and material that tears easily. When a cover shows these signs, replacement is necessary—degraded covers provide inadequate protection and create safety hazards.
Debris Accumulation: Leaves, branches, and debris that accumulate on pool covers can create problems if not removed periodically. Wet leaves block cover pump intakes, create staining from tannins, and add weight that stresses cover material. Remove debris monthly using a pool leaf net or soft push broom. Never walk on pool covers to remove debris—even safety covers can be hazardous when covered with wet leaves or when sagging from water accumulation.
Safe cover maintenance requires following key principles: never walk on any pool cover unless it’s a properly installed and tensioned safety cover rated for human weight; always use proper tools (soft rakes, brooms, pool leaf nets) rather than sharp implements; address problems immediately rather than waiting for spring; and replace damaged or degraded covers rather than attempting extensive repairs that may fail at critical moments.
Winterizing the Fresh Water Fill Pipe
The fresh water fill line or autofill line represents one of the most commonly overlooked components during pool winterization, yet it’s highly vulnerable to freeze damage because these lines often run through shallow trenches with minimal earth insulation. Professional pool technicians have corrected countless expensive freeze damage repairs that resulted from this single oversight in otherwise thorough DIY winterization.
Fresh water fill lines supply pools with makeup water to replace evaporation during swimming season. These lines typically connect directly to household water supply, running from the house to pool area through shallow trenches. The lines usually have shut-off valves at one or both ends and often include backflow preventers or autofill mechanisms. During winter, water remaining in these lines can freeze, causing cracks in pipes or damage to autofill mechanisms costing $200-500 to repair.
Winterization of accessible fill lines requires locating the shut-off valve, typically found in an underground valve box near the pool equipment or house, or sometimes in the basement or garage where the line connects to household plumbing. Close the shut-off valve completely to isolate the fill line from the main water supply. Then locate the fill line’s pool-side connection—often at the pool wall behind a protective cover or in the skimmer itself. Open or remove this connection point to allow the line to drain. For maximum drainage, blow compressed air through the line from the house end, forcing water out the pool-side connection.
After draining as much water as possible, add pool antifreeze to protect any water remaining in the line. Remove the pool-side connection cap or plug, and pour approximately 1 pint of RV/marine grade antifreeze into the opening. The antifreeze flows down into the line, protecting water that couldn’t be removed through drainage or blow-out. Replace the connection cap loosely to prevent debris entry while allowing any condensation to escape.
Autofill mechanisms present additional winterization challenges because they contain valves, floats, and mechanical components that can be damaged by freezing. Many autofills can be removed entirely for winter storage—consult your autofill’s manual for specific instructions. If removal isn’t practical, drain the autofill mechanism completely, add antifreeze to protect internal components, and cover the unit with insulated material or equipment covers to provide some freeze protection.
For inaccessible fill lines—those without convenient access points or shut-off valves—the safest winterization approach involves shutting off the house-side valve if accessible, then relying on pool antifreeze protection. Add antifreeze through the pool-side connection and ensure you use enough to protect the entire line length. Calculate approximately 1 pint of antifreeze per 10 feet of line for 1/2-inch or 3/4-inch supply lines.
The consequences of neglecting fill line winterization vary by climate and installation. In regions with mild winters and occasional brief freezes, damaged fill lines may develop slow leaks that go unnoticed until spring when autofill systems fail or water bills increase unexpectedly. In harsh winter climates, completely burst fill lines can dump hundreds of gallons of water daily, creating expensive water bills, foundation problems from water infiltration, and costly emergency repairs during winter.
Mid-Winter Pool Maintenance
Pool winterization is not a set-it-and-forget-it process, particularly in regions experiencing variable winter weather with temperature swings, heavy precipitation, or prolonged snow cover. Regular mid-winter pool monitoring and maintenance prevents small problems from escalating into expensive damage while ensuring your pool remains protected through the entire off-season.
Establish a monthly winter pool inspection routine throughout the dormant season. During each inspection, systematically evaluate cover condition, equipment security, water accumulation, and any signs of damage or problems. This proactive approach allows you to address issues immediately rather than discovering extensive damage at spring opening.
Cover Inspection and Maintenance: Check your pool cover monthly for tears, excessive sagging, proper tensioning, and secure attachment. For solid covers, verify that cover pumps are functioning correctly and haven’t become clogged with debris or frozen. Remove any accumulated water, snow, or debris that exceeds normal amounts. Inspect water bags or cover weights to ensure they remain properly positioned and haven’t shifted or deteriorated. For safety covers, check anchor springs and cover tension, re-tightening if necessary using your cover’s tensioning system.
Equipment Security: Verify that all equipment covers or protective tarps remain in place and properly secured. Check that drain plugs haven’t been reinstalled (which could trap water in equipment). Inspect equipment areas for any water accumulation, ice damage, or animal intrusion—small animals sometimes seek shelter in equipment areas during winter.
Plumbing Protection: Visually inspect any exposed plumbing for frost heaving or ground movement that might stress pipes. Verify that winterizing plugs remain firmly installed in return lines and skimmers. If temperatures have been particularly severe, consider adding additional pool antifreeze through skimmer or accessible plumbing access points for extra protection.
Water Level Monitoring: Check pool water level to ensure it remains at the proper height for winter. Unexpected water loss could indicate leaks that should be addressed, while rising water suggests groundwater infiltration or excessive precipitation that might require draining. Significant water level changes can affect cover fit and create stress on pool structures.
Weather Response: After any severe weather events—ice storms, heavy snow, extreme cold snaps, or high winds—perform additional pool inspections beyond your monthly routine. These extreme events create the highest risk of cover damage, equipment problems, or plumbing stress. Immediate post-storm assessment allows quick response to any emerging problems.
Chemical Supplementation: In mild climates or during unusual warm spells, pool water can develop algae even with winter chemical treatment. If you notice water discoloration during mid-winter inspection, consider supplementing winter algaecide treatment. Remove enough cover to add additional algaecide (following product directions), allow it to disperse for several hours, then resecure the cover.
Access During Winter: Maintain safe access to your pool area throughout winter. Clear snow from paths to pool equipment and cover areas. Ensure you can safely reach your pool cover to inspect it and perform maintenance without risk of falls or injury. Keep ladders, long-handled tools, and safety equipment accessible for cover maintenance.
Documentation: Photograph your pool at monthly inspections, particularly noting cover condition, water levels, and equipment status. This documentation helps identify gradual changes that might not be obvious month-to-month and provides records if insurance claims become necessary due to weather damage.
Winter pool maintenance requires only 15-20 minutes monthly but prevents hundreds or thousands of dollars in damage from undetected problems. Pool owners who maintain vigilance through winter months enjoy easier spring openings, better water quality, and fewer unpleasant surprises when reopening season arrives.
Spring Reopening: How Proper Winterization Makes Your Life Easier
The true test of successful winterization reveals itself during spring pool opening. Pools that received thorough, proper winterization preparation open quickly with minimal effort, excellent water quality, and fully functional equipment. In contrast, inadequately winterized pools create frustrating spring opening challenges: extensive cleaning requirements, stubborn water chemistry problems, and potential equipment repairs from freeze damage discovered only when restart is attempted.
Properly winterized pools typically require just 3-5 hours for complete spring opening procedures—removing and storing covers, reinstalling drain plugs and equipment components, refilling water to operating level, restarting equipment, and balancing water chemistry. The water beneath winter covers in well-winterized pools remains clear or slightly cloudy, requiring only basic shock treatment and standard chemical balancing to achieve swim-ready conditions. Equipment that was thoroughly drained and protected restarts smoothly without complications, and plumbing systems function normally without signs of freeze damage.
Compare this to poorly winterized pools, which can require 10-20 hours of opening work spread over several days. Water that wasn’t properly treated often displays dark green or black coloration from algae growth, requiring multiple shock treatments, extensive chemical additions, and days of filtration and vacuuming to clear. Inadequate equipment drainage sometimes results in cracked housings, damaged seals, or frozen motors requiring expensive repairs or replacement before the pool can operate. Plumbing lines that weren’t properly protected may have freeze cracks necessitating leak detection and repair.
The financial impact of winterization quality becomes especially clear at spring opening. A properly winterized pool might require $75-150 in opening chemicals (shock, algaecide, startup chemicals) and perhaps $200-300 for professional opening service if you choose not to DIY. A pool that wasn’t adequately winterized can easily require $300-500 in chemicals alone to address severe algae blooms, plus equipment repairs that range from $400 for minor component replacement to $2,000+ for pump/filter/heater damage.
Water chemistry balancing proceeds much more smoothly in well-winterized pools because starting parameters remain closer to target ranges. Alkalinity, pH, and calcium hardness typically require only minor adjustments rather than major corrections. The time and effort invested in proper pre-winterization chemistry pays dividends through this easier spring balancing process.
Pool surfaces also benefit dramatically from proper winterization. Pools that maintained proper chemistry and winterizing chemical treatment show minimal staining, scaling, or surface degradation. Those with inadequate chemical preparation often display stubborn staining from metal oxidation, organic debris decomposition, or scale formation requiring professional treatment or even acid washing to correct.
Equipment longevity directly correlates with winterization thoroughness. Pumps, filters, and heaters that were completely drained, protected, and stored properly last significantly longer than equipment that experienced freeze-thaw cycles, moisture exposure, or residual water damage. The modest annual investment in careful winterization extends equipment lifespan by years, representing thousands of dollars in delayed replacement costs.
The relationship between winterization effort and spring opening ease is nearly linear—the more thoroughly you winterize, the easier your spring opening becomes. This reality should inform your decision-making about winterization quality: cutting corners during fall closing creates magnified work during spring opening, while extra thoroughness in fall pays immediate dividends when swimming season returns.
Final Thoughts: Is Professional Pool Winterizing Worth the Cost?
Pool owners face a fundamental decision each fall: invest several hours performing DIY winterization, or pay professionals $200-500 for comprehensive closing service. The right choice depends on multiple factors including pool complexity, personal expertise, available time, and risk tolerance regarding potential mistakes.
DIY winterization makes excellent sense for pool owners who: possess all necessary equipment (particularly an adequate air compressor), have experience with pool maintenance and basic plumbing concepts, own relatively simple pool systems without complex automation or extensive water features, enjoy hands-on maintenance work, and have flexible schedules allowing unhurried, thorough completion of winterization procedures. For these pool owners, DIY winterization represents genuine savings while providing satisfaction of self-reliance and comprehensive understanding of their pool systems.
Professional winterization proves worthwhile for pools with: complex plumbing systems, extensive automation, valuable or complex equipment (high-end variable-speed pumps, expensive heaters, elaborate water features), or when pool owners lack specific tools like air compressors. Additionally, pool owners who: have limited time for thorough winterization, lack confidence in their ability to properly execute critical steps like line blow-outs, want liability protection if winterization failures cause damage, or simply prefer leaving specialized tasks to experts often find professional service represents good value despite higher immediate costs.
Cost-benefit analysis should consider the consequences of errors, not just service costs. Professional winterization costing $300-500 provides insurance against thousands in potential freeze damage from DIY mistakes. For pools with equipment investments exceeding $5,000, professional service represents 6-10% of equipment value—reasonable insurance for protecting that investment. However, for simpler above-ground pools with equipment investments under $1,000, DIY winterization makes more economic sense.
A hybrid approach works well for many pool owners: hire professionals every 2-3 years for comprehensive winterization including detailed equipment servicing, while performing DIY winterization in interim years following the professional standard. This approach builds DIY skills while maintaining periodic professional oversight that catches developing problems and ensures critical procedures remain correctly executed.
Regardless of whether you choose DIY or professional winterization, the fundamental importance remains constant: thorough pool winterization protects significant investment, prevents expensive damage, and ensures easier spring reopening. The worst choice isn’t DIY versus professional—it’s inadequate winterization of either type. Whether you perform the work yourself or hire professionals, ensure every critical step receives proper attention and execution.
Frequently Asked Questions
Close your pool when water temperature drops to 65°F and consistently stays at or below this level. This typically occurs in late September to mid-October in northern climates, and mid-October to early November in moderate climates. The 65°F threshold slows algae growth significantly while providing time to complete winterization before any hard freezes occur. Never wait for actual freezing weather—complete winterization before the first freeze to prevent equipment damage.
Essential winterization supplies include: pool shock and winter algaecide for chemical treatment, winterizing plugs sized for your returns and skimmer, pool antifreeze (RV/marine grade), an air compressor for blowing out lines, pH and alkalinity adjusters, a winter pool cover appropriate for your pool type, cover pump for solid covers, and cover weights or anchors. Above-ground pools additionally require an air pillow. Having all supplies before starting prevents mid-project delays.
Remove all drain plugs from pump, filter, and heater to allow complete drainage. Tip or invert equipment to ensure all water drains from chambers, valves, and housings. Blow compressed air through equipment to remove residual moisture from seals and hard-to-drain areas. Store drain plugs and small parts in labeled containers. If equipment must remain outside, cover with waterproof equipment covers allowing air circulation. Never leave any water in equipment in freezing climates.
Failure to winterize leads to expensive freeze damage including burst plumbing lines ($800-1,500 repair), cracked pump and filter housings ($300-1,500 replacement), damaged heaters ($1,000+), and pool structure damage ($2,000-5,000+). Additionally, improperly maintained water develops severe algae requiring extensive chemical treatment and cleaning. Equipment exposed to freezing without proper drainage often needs complete replacement. Spring opening becomes significantly more difficult and expensive, potentially requiring professional remediation costing thousands of dollars.
Use an air compressor to blow out all plumbing lines, watching return jets until only air bubbles emerge, then immediately install winterizing plugs to seal returns. Blow air through skimmer lines and seal with plugs or gizzmos. For main drain and lines that can’t fully drain, add RV/marine grade pool antifreeze—approximately 1 gallon per 10 feet of pipe. Never use automotive antifreeze. Proper plumbing winterization prevents freeze damage that causes the most expensive pool repairs.
About PHX Pool Crew
PHX Pool Crew provides professional weekly pool service throughout Phoenix and East Valley. Our certified pool technicians specialize in Arizona pools, handling everything from routine maintenance to green pool recovery. We understand the unique challenges of Phoenix heat, monsoon season, and hard water—delivering reliable, hassle-free pool care for homeowners in Scottsdale, Mesa, Tempe, Gilbert, and Chandler.
Published: December 28, 20256| Last Updated: December 28, 2025

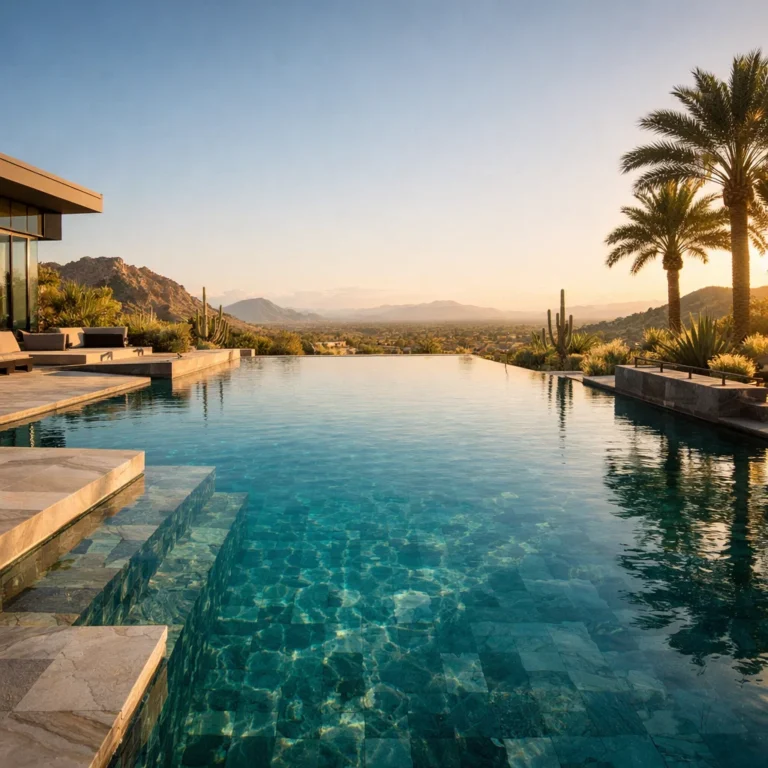
